Fulfilling Requests
You can use your Chainlink nodes to fulfill requests. This guide shows you how to deploy your own operator contract and add jobs to your node so that it can provide data to smart contracts.
Chainlink nodes can fulfill requests from open or unauthenticated APIs without the need for External Adapters as long as you've added the jobs to the node. For these requests, requesters supply the URL to the open API that they want each node to retrieve. The Chainlink node will use tasks to fulfill the request.
Some APIs require authentication by providing request headers for the operator's API key, which the Chainlink node supports. If you would like to provide access to an API that requires authentication, you must create a job that is specific for that API either using an external adapter or by using the parameters of the HTTP task.
Requirements
Before you begin this guide, complete the following tasks to make sure you have all of the tools that you need:
-
Fund the Ethereum address that your Chainlink node uses. You can find the address in the node Operator GUI under the Key Management configuration. The address of the node is the
Regulartype. You can obtain test ETH from several faucets. For this tutorial to work, you will have to fund the node's Ethereum address with Sepolia ETH. Here is an example:
Address types
Your node works with several different types of addresses. Each address type has a specific function:
- Node address: This is the address for your Chainlink node wallet. The node requires native gas tokens at all times to respond to requests. For this example, the node uses Sepolia ETH. When you start a Chainlink node, it automatically generates this address. You can find this address on the Node Operator GUI under Key Management > EVM Chain Accounts.
- Oracle contract address: This is the address for contracts like
Operator.solthat are deployed to a blockchain. Do not fund these addresses with native gas tokens such as ETH. When you make API call requests, the funds pass through this contract to interact with your Chainlink node. This will be the address that smart contract developers point to when they choose a node for an API call. - Admin wallet address: This is the address that owns your
Operator.solcontract addresses. If you're on OCR, this is the wallet address that receives LINK tokens.
Set up your Operator contract
Deploy your own Operator contract
-
Go to Remix and open the
Operator.solsmart contract. -
On the Compile tab, click the Compile button for
Operator.sol. Remix automatically selects the compiler version and language from thepragmaline unless you select a specific version manually. -
On the Deploy and Run tab, configure the following settings:
-
Select "Injected Provider" as your Environment. The Javascript VM environment cannot access your oracle node. Make sure your Metamask is connected to Sepolia testnet.
-
Select the "Operator" contract from the Contract menu.
-
Copy the LINK token contract address for the network you are using and paste it into the
LINKfield next to the Deploy button. For Sepolia, you can use this address:0x779877A7B0D9E8603169DdbD7836e478b4624789 -
Copy the Admin wallet address into the
OWNERfield.
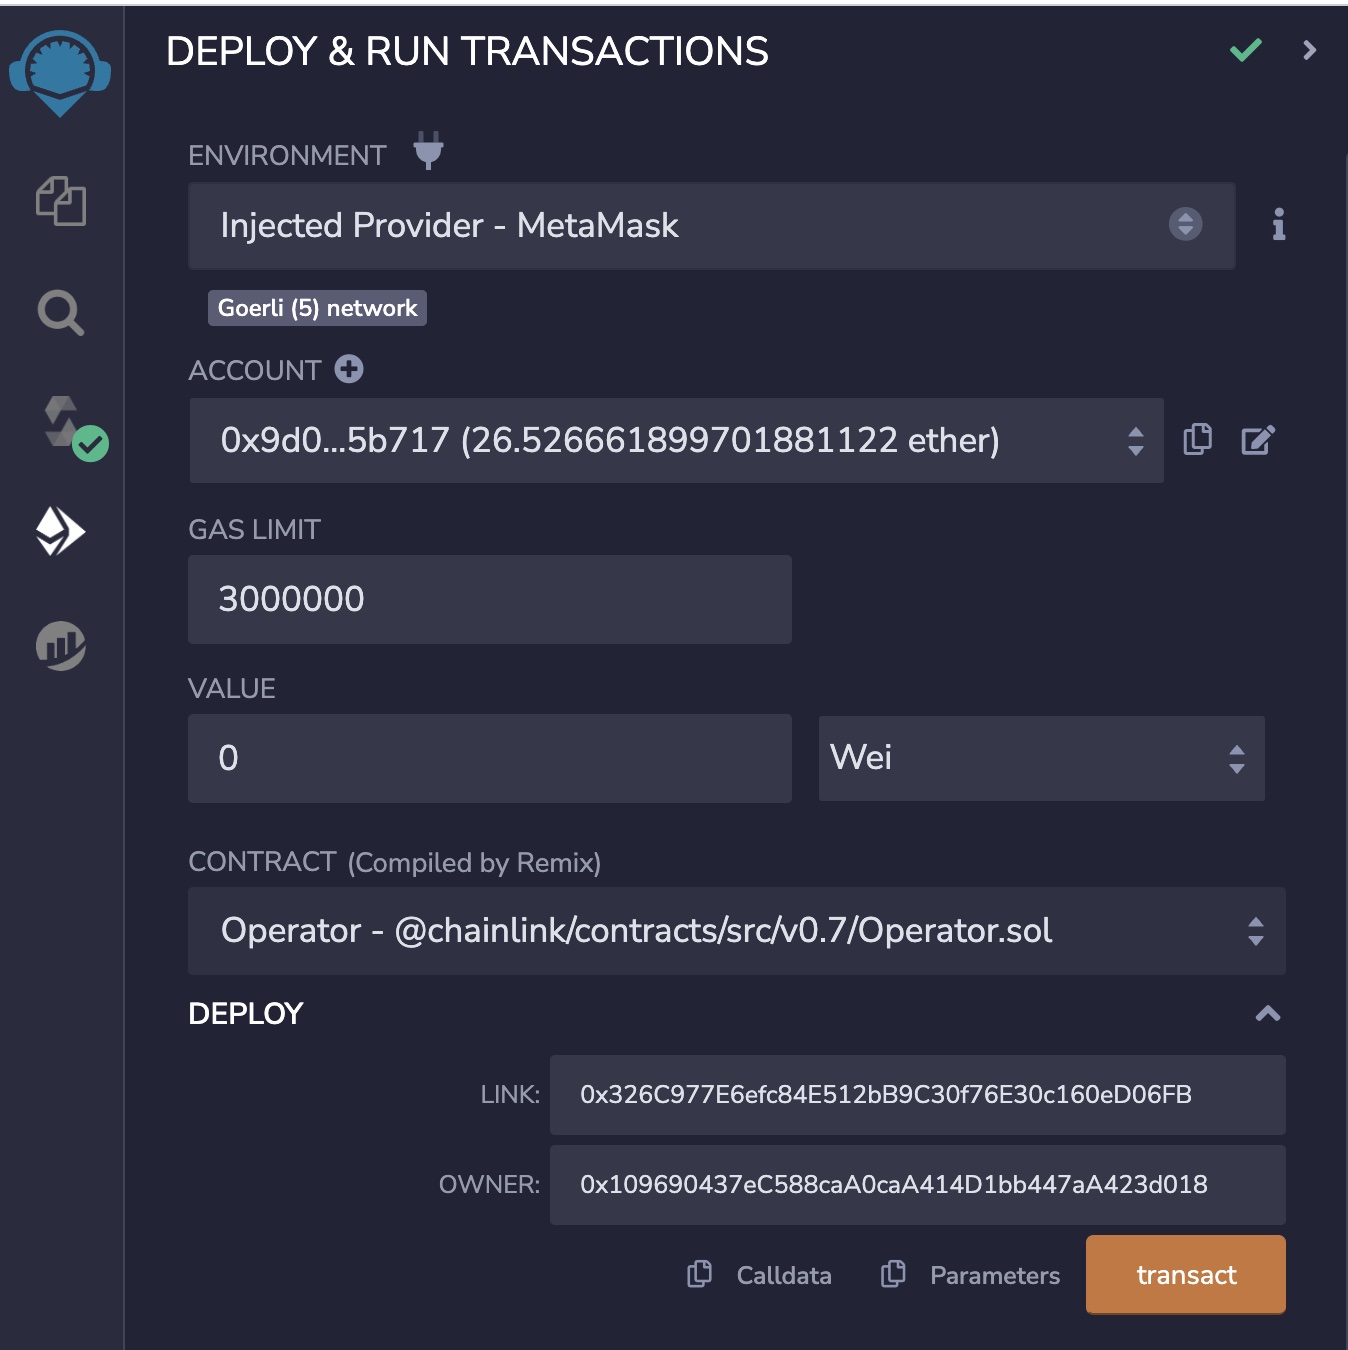
-
-
Click transact. MetaMask prompts you to confirm the transaction.
-
If the transaction is successful, a new address displays in the Deployed Contracts section.

-
Keep note of the Operator contract address. You need it later for your consuming contract.
Whitelist your node address in the Operator contract
-
In the Chainlink node GUI, find and copy the address of your chainlink node. see Requirements.
-
In Remix, call the
setAuthorizedSendersfunction with the address of your node. Note the function expects an array.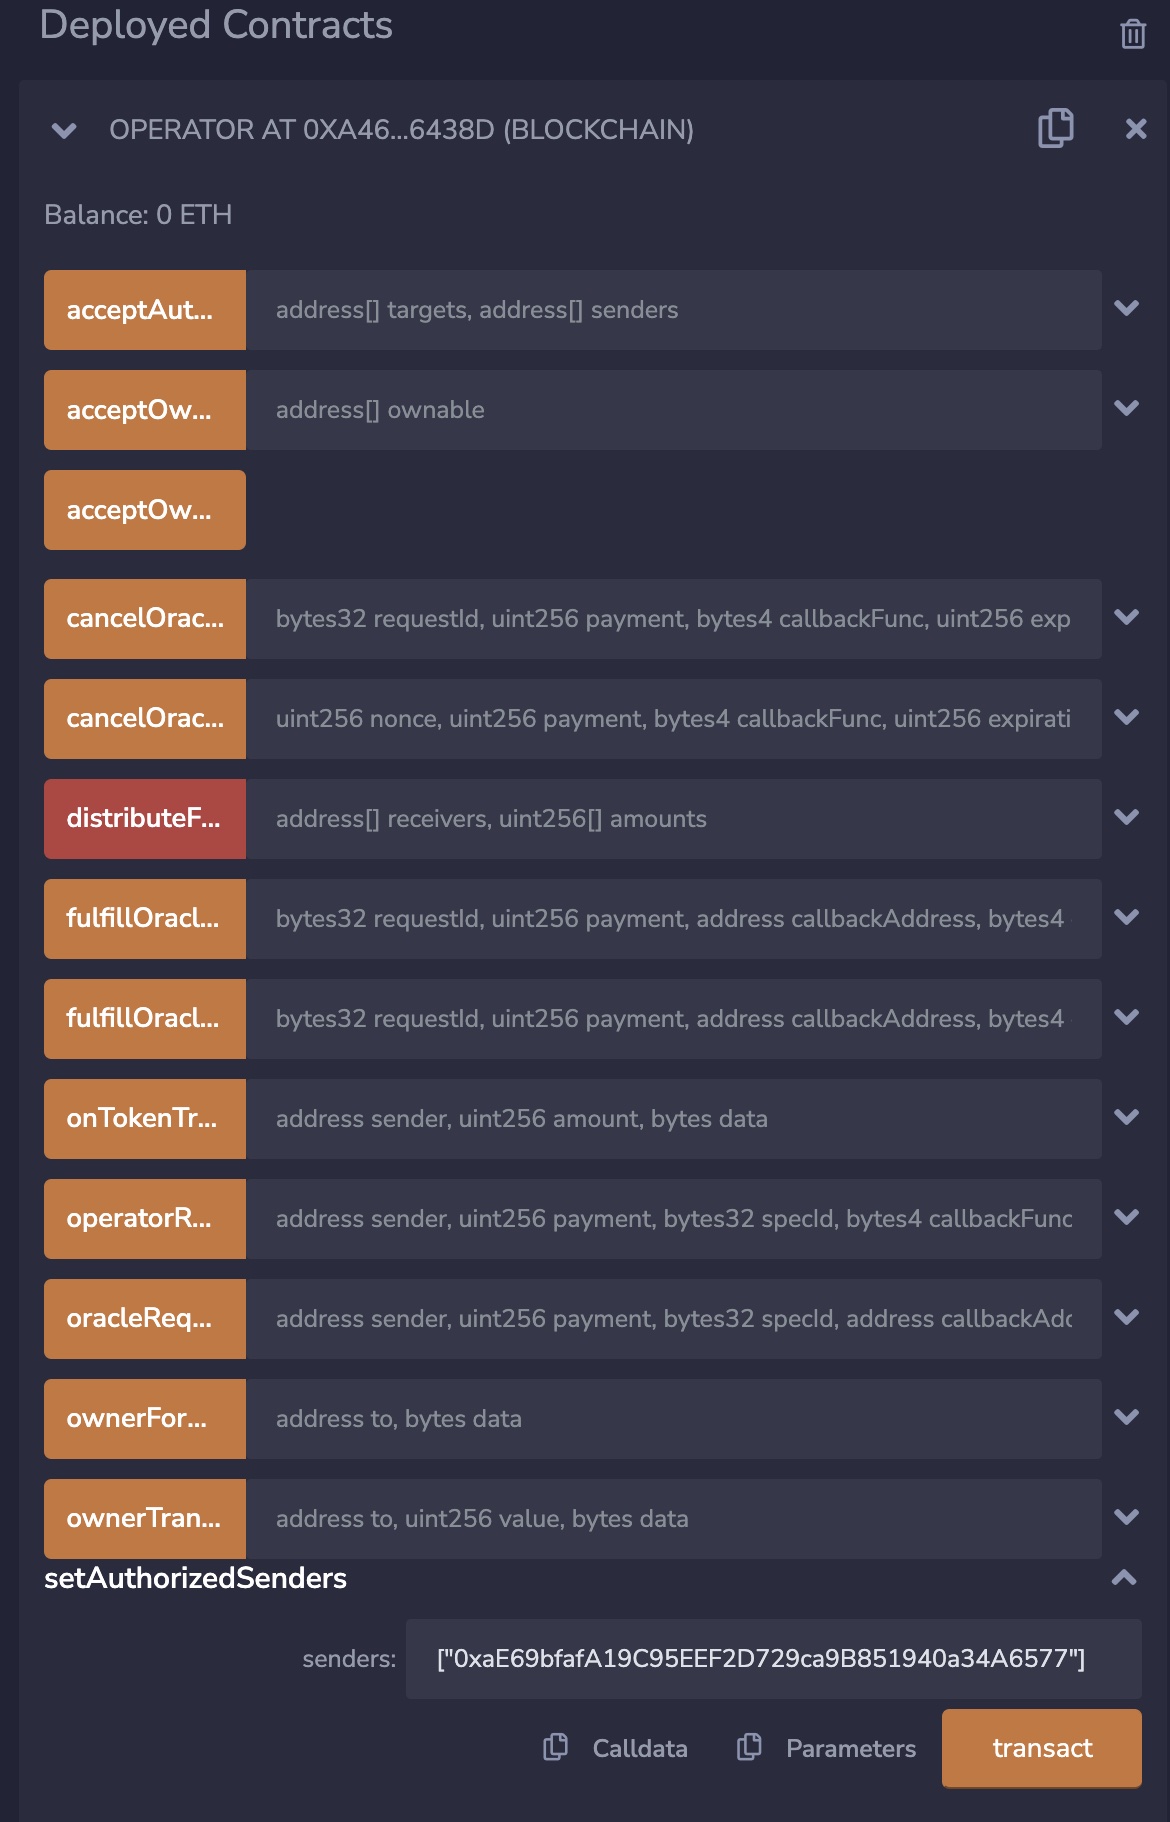
-
Click the
transactfunction to run it. Approve the transaction in MetaMask and wait for it to confirm on the blockchain. -
Call
isAuthorizedSenderfunction with the address of your node to verify that your chainlink node address can call the operator contract. The function must returntrue.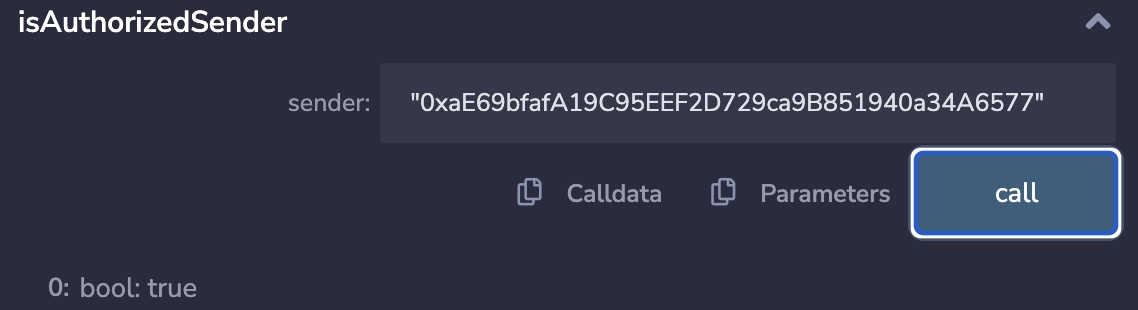
Add a job to the node
You will create a job that calls an OpenAPI , parses the response and then returns a uint256.
-
In the Chainlink Operator UI on the Jobs tab, click New Job.

-
Paste the job specification from above into the text field.
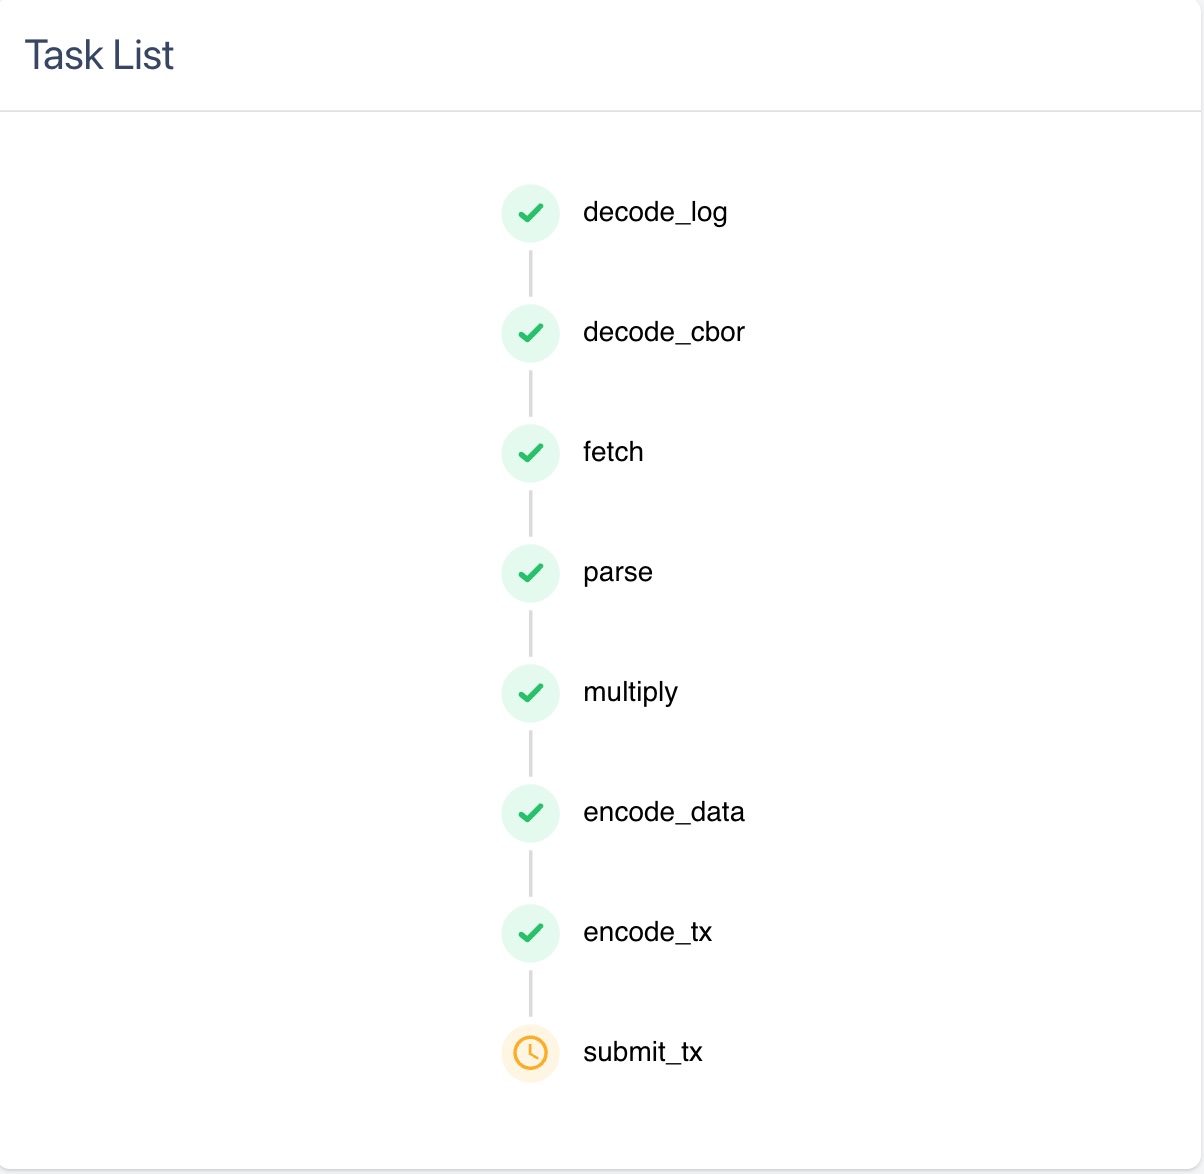
# THIS IS EXAMPLE CODE THAT USES HARDCODED VALUES FOR CLARITY. # THIS IS EXAMPLE CODE THAT USES UN-AUDITED CODE. # DO NOT USE THIS CODE IN PRODUCTION. name = "Get > Uint256 - (TOML)" schemaVersion = 1 type = "directrequest" # evmChainID for Sepolia Testnet evmChainID = "11155111" # Optional External Job ID: Automatically generated if unspecified # externalJobID = "b1d42cd5-4a3a-4200-b1f7-25a68e48aad8" contractAddress = "YOUR_OPERATOR_CONTRACT_ADDRESS" maxTaskDuration = "0s" minIncomingConfirmations = 0 observationSource = """ decode_log [type="ethabidecodelog" abi="OracleRequest(bytes32 indexed specId, address requester, bytes32 requestId, uint256 payment, address callbackAddr, bytes4 callbackFunctionId, uint256 cancelExpiration, uint256 dataVersion, bytes data)" data="$(jobRun.logData)" topics="$(jobRun.logTopics)"] decode_cbor [type="cborparse" data="$(decode_log.data)"] fetch [type="http" method=GET url="$(decode_cbor.get)" allowUnrestrictedNetworkAccess="true"] parse [type="jsonparse" path="$(decode_cbor.path)" data="$(fetch)"] multiply [type="multiply" input="$(parse)" times="$(decode_cbor.times)"] encode_data [type="ethabiencode" abi="(bytes32 requestId, uint256 value)" data="{ \\"requestId\\": $(decode_log.requestId), \\"value\\": $(multiply) }"] encode_tx [type="ethabiencode" abi="fulfillOracleRequest2(bytes32 requestId, uint256 payment, address callbackAddress, bytes4 callbackFunctionId, uint256 expiration, bytes calldata data)" data="{\\"requestId\\": $(decode_log.requestId), \\"payment\\": $(decode_log.payment), \\"callbackAddress\\": $(decode_log.callbackAddr), \\"callbackFunctionId\\": $(decode_log.callbackFunctionId), \\"expiration\\": $(decode_log.cancelExpiration), \\"data\\": $(encode_data)}" ] submit_tx [type="ethtx" to="YOUR_OPERATOR_CONTRACT_ADDRESS" data="$(encode_tx)"] decode_log -> decode_cbor -> fetch -> parse -> multiply -> encode_data -> encode_tx -> submit_tx """ -
Replace
YOUR_OPERATOR_CONTRACT_ADDRESSwith the address of your deployed operator contract address from the previous steps. -
Click Create Job. If the node creates the job successfully, a notice with the job number appears.

-
Click the job number to view the job details. You can also find the job listed on the Jobs tab in the Node Operators UI. Save the
externalJobIDvalue because you will need it later to tell your consumer contract what job ID to request from your node.
Create a request to your node
After you add jobs to your node, you can use the node to fulfill requests. This section shows what a requester does when they send requests to your node. It is also a way to test and make sure that your node is functioning correctly.
-
Note that
_setChainlinkToken(0x779877A7B0D9E8603169DdbD7836e478b4624789)is configured for Sepolia. -
On the Compiler tab, click the Compile button for
ATestnetConsumer.sol. -
On the Deploy and Run tab, configure the following settings:
- Select Injected Provider as your environment. Make sure your metamask is connected to Sepolia.
- Select ATestnetConsumer from the Contract menu.
-
Click Deploy. MetaMask prompts you to confirm the transaction.
-
Fund the contract by sending LINK to the contract's address. See the Fund your contract page for instructions. The address for the
ATestnetConsumercontract is on the list of your deployed contracts in Remix. You can fund your contract with 1 LINK. -
After you fund the contract, create a request. Input your operator contract address and the job ID for the
Get > Uint256job into therequestEthereumPricerequest method without dashes. The job ID is theexternalJobIDparameter, which you can find on your job's definition page in the Node Operators UI.
-
Click the transact button for the
requestEthereumPricefunction and approve the transaction in Metamask. TherequestEthereumPricefunction asks the node to retrieveuint256data specifically from https://min-api.cryptocompare.com/data/price?fsym=ETH&tsyms=USD. -
After the transaction processes, you can see the details for the complete the job run the Runs page in the Node Operators UI.
-
In Remix, click the
currentPricevariable to see the current price updated on your consumer contract.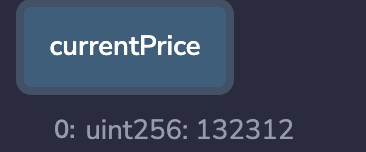
Withdrawing LINK
You can withdraw LINK from the operator contract. In Remix under the list of deployed contracts, click on your Operator contract and find the withdraw function in the function list. Note that only the admin (see Admin wallet address) can withdraw LINK.
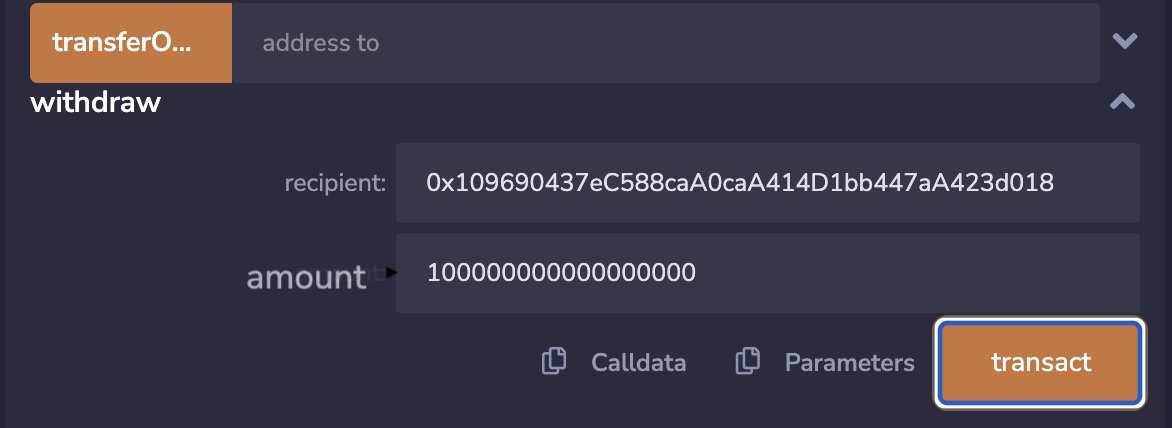
Paste the address you want to withdraw to, and specify the amount of LINK that you want to withdraw. Then, click withdraw. Confirm the transaction in MetaMask when the popup appears.