Objective
In this tutorial, you will learn how to set up a time-based upkeep to automate a smart contract function using Chainlink Automation. You can use time-based upkeeps to:
- Schedule a rebalancing activity
- Schedule a recurring payment
- Schedule circuit breaker checks
- Automate triggering of any smart contract function that needs to run on a certain time schedule, or at a certain time in the future
Before you begin
Before you start this tutorial, complete the following items:
- If you are new to smart contract development, learn how to Deploy Your First Smart Contract.
- Set up a cryptocurrency wallet such as MetaMask.
- Fund your wallet with the following testnet tokens:
- The gas currency for the chain where your contract is deployed. For this example, get 0.5 Sepolia ETH from one of the available public faucets.
- ERC-677 LINK. Get 20 testnet LINK.
Steps to implement
1 Deploy a smart contract to automate
If you already have a deployed smart contract that you want to automate, make sure the contract has an external or public function that modifies the state of the contract onchain. In Solidity, pure and view functions do not update the state, so even if these functions are public, you cannot automate them with Chainlink Automation.
If you do not already have a deployed contract, follow these instructions to deploy a simple counter contract. This contract has a public counter variable that you can update by adding the updateAmount value to it.
-
Open the
Counter.solcontract in Remix:// SPDX-License-Identifier: MIT pragma solidity ^0.8.20; /** * THIS IS AN EXAMPLE CONTRACT THAT USES HARDCODED VALUES FOR CLARITY. * THIS IS AN EXAMPLE CONTRACT THAT USES UN-AUDITED CODE. * DO NOT USE THIS CODE IN PRODUCTION. */ contract Counter { /** * Public counter variable */ uint256 public counter; constructor() { counter = 0; } function updateCounter( uint256 updateAmount ) external { counter += updateAmount; } } -
Under the Solidity compiler tab, compile the contract:
-
Under the Deploy and run transactions tab, select Injected Provider - MetaMask for the Environment field.
-
Click Deploy. MetaMask opens and prompts you to confirm the contract deployment transaction:
-
Copy the address of your newly deployed contract. You can find this in Sepolia Etherscan through the contract deployment transaction, or in Remix in the Deployed Contracts section:
2 Provide contract information
If your smart contract is already verified onchain, skip to the next step.
Chainlink Automation needs your smart contract's Application Binary Interface (ABI) in order to automate the public functions in your contract. If your smart contract is not verified onchain, you must either provide your contract's ABI manually, or verify the contract onchain.
Verify your contract
Verify your contract directly in the blockchain explorer by adding your contract's source code and other required information in the blockchain explorer UI. For example:
- Verify contracts deployed to Sepolia on the testnet version of Etherscan.
After you successfully verify your smart contract, the Chainlink Automation App fetches its ABI automatically when you register an upkeep:
Add the ABI manually
If you do not want to verify the contract on chain, paste the contract's ABI into the corresponding text box in the Chainlink Automation App while you are registering the upkeep.
-
In Remix, within the Solidity Compiler tab, copy the ABI here:
-
In the Chainlink Automation App, paste the ABI into the ABI field:
3 Register a new Upkeep
-
Click the Register New Upkeep button
-
Connect your wallet using the Connect Wallet choose a network. For a list of supported networks, see the Supported Blockchain Networks section. The Chainlink Automation App also lists the currently supported networks.
-
Select the time-based trigger.
-
Provide the address of your deployed contract. If your contract is not verified, paste the ABI into the corresponding text box.
-
If you're using the
Countercontract, add a value for the function input in the Chainlink Automation App:Each time Automation triggers your function, based on the schedule you give it, it will run the
updateCounterfunction which increments thecountervariable using the value you enter forupdateAmount.
4 Specify the time schedule
After you enter the basic contract information, specify your time schedule in the form of a CRON expression. CRON expressions are a shorthand way to create a time schedule. Use the provided example buttons to experiment with different schedules and then create your own, or see the format and examples below.
For the Counter contract, enter */5 * * * * to run the updateCounter function every five minutes:
The Chainlink Automation App displays the next five scheduled events to help you confirm that you have entered your desired schedule correctly.
After you enter your cron expression, click Next.
Cron format
Cron jobs are interpreted according to this format:
  ┌───────────── minute (0 - 59)
  │ ┌───────────── hour (0 - 23)
  │ │ ┌───────────── day of the month (1 - 31)
  │ │ │ ┌───────────── month (1 - 12)
  │ │ │ │ ┌───────────── day of the week (0 - 6) (Sunday to Saturday)
  │ │ │ │ │
  │ │ │ │ │
  │ │ │ │ │
  * * * * *

All times are in UTC

- can be used for range e.g. "0 8-16 * * *"
/ can be used for interval e.g. "0 */2 * * *"
, can be used for list e.g. "0 17 * * 0,2,4"

  Special limitations:
    * there is no year field
    * no special characters: ? L W #
    * lists can have a max length of 26
    * no words like JAN / FEB or MON / TUES
Cron schedule examples
| Cron expression | Schedule |
|---|---|
* * * * * | Every minute |
0 8-16 * * * | Every hour between 08:00-16:00 UTC |
0 */2 * * * | Every two hours |
0 17 * * 0,2,4 | Sunday, Tuesday and Thursday at 17:00 UTC |
5 Entering upkeep details
To complete the upkeep registration process, you must enter some information about your upkeep including its name, gas limit, starting balance LINK, and contact information.
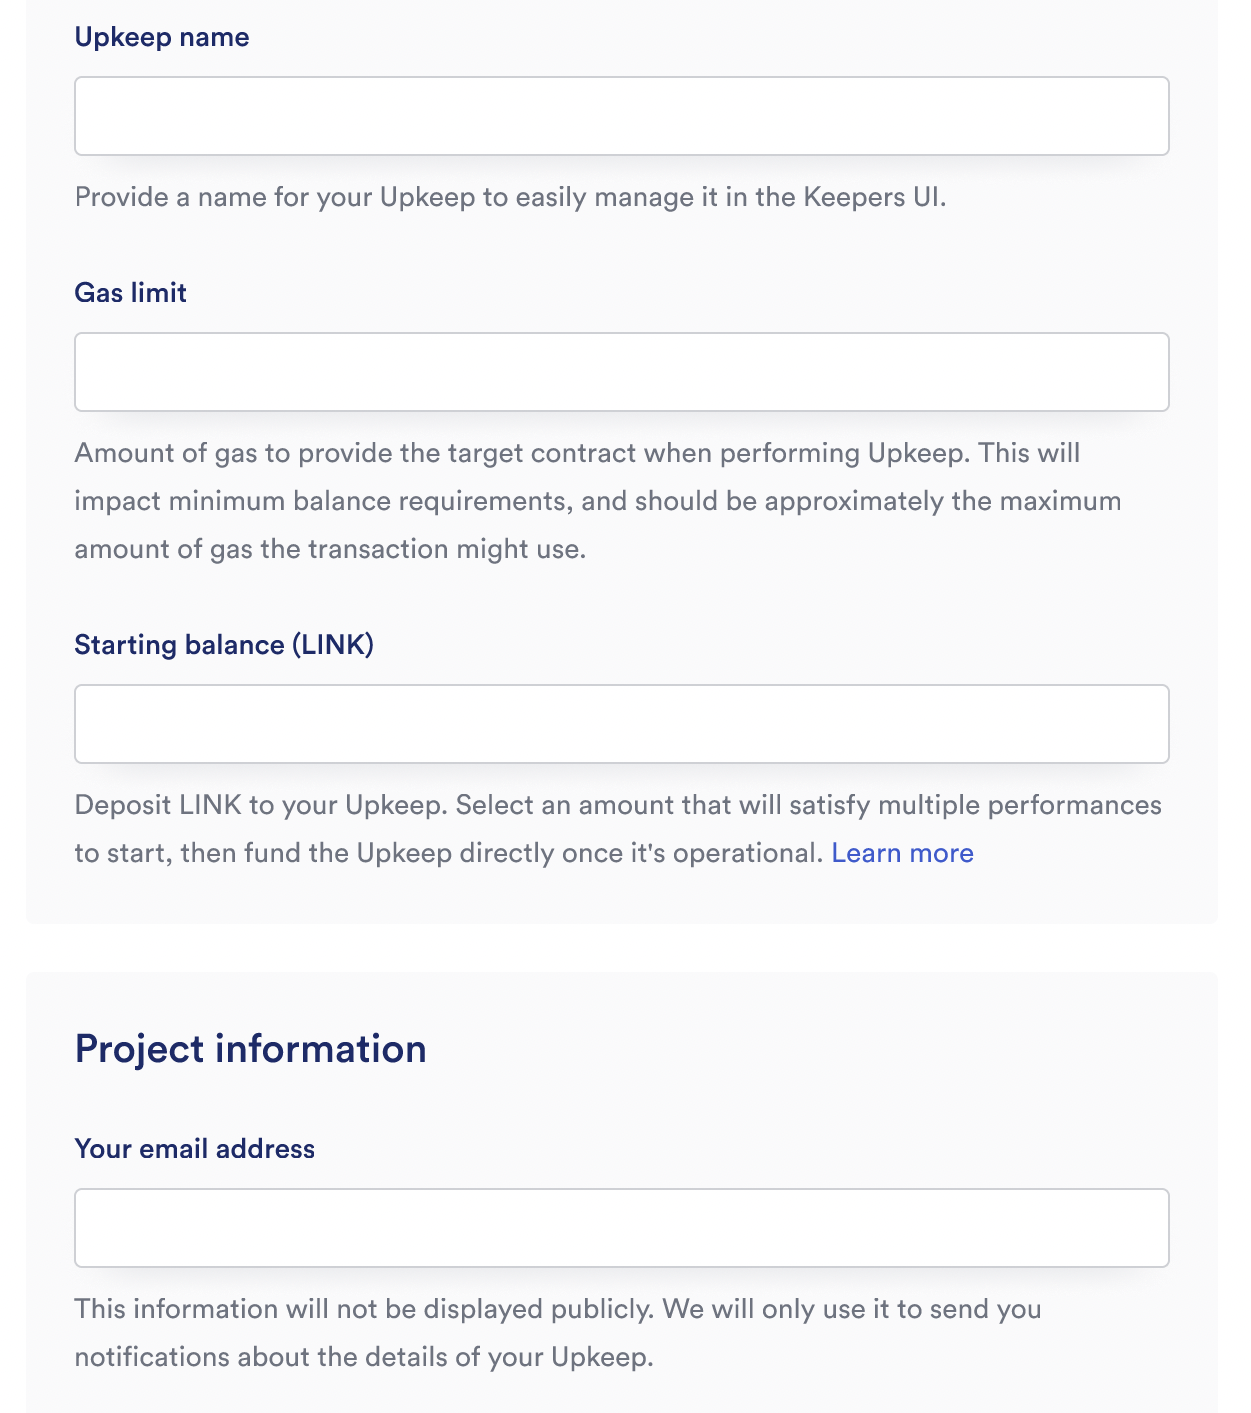
- Complete the required details:
- Upkeep name: This will be publicly visible in the Chainlink Automation app.
- Gas limit: This is the maximum amount of gas that your transaction requires to execute on chain. This value defaults to 500000, which is sufficient for the simple
updateCounterfunction in theCountercontract. If the gas required to execute your transaction exceeds the gas limit that you specified, your transaction will not be confirmed. - Starting balance (LINK): Specify a LINK starting balance to fund your upkeep. If you're using the
Countercontract, 3 LINK is a sufficient starting balance. If your upkeep is underfunded after you create it, you can add more funds later. - Your email address: This email address will be encrypted and is used to send you an email when your upkeep is underfunded.
6 Check your counter variable
You can check the value of the counter variable in your contract in Remix. If you verified your contract, you can also check it in Sepolia Etherscan.
In the Deployed Contracts tab, click the counter button to check the value of the counter variable.
If you verified the Counter contract, you can check the value of the counter variable in Sepolia Etherscan to see that it has been updated after 5 minutes. For example, this contract has the following value after being updated every 5 minutes for about one day:
7 Manage your upkeep
You can manage your upkeep in the Chainlink Automation App, or by directly using the registry contract functions.
In the Chainlink Automation App, within the Details page for each upkeep, you can find this Actions menu:
To pause your upkeep, select Pause upkeep. Chainlink Automation App prompts you to approve the upkeep pause, while MetaMask opens and prompts you to confirm the "pause upkeep" transaction:
Pausing the upkeep can be useful for debugging. If you discover a problem with the contract you registered initially, you can pause the upkeep, update the upkeep to use a new contract, and then unpause the upkeep.
For the upkeep to continue running, you must maintain a minimum balance. The upkeep stops running if it is underfunded. To withdraw funds from an upkeep, you must cancel the upkeep.