Overview
You can write your first smart contract and run it in your browser without any knowledge about Ethereum or blockchains. This guide shows you how easy it is to develop smart contracts using the Solidity language, a MetaMask wallet and the Remix Development Environment. You can use all of these tools in your browser for free with no signup required.
Objective
You will create and deploy a simple "Hello world" smart contract using the following process:
-
Write: Write a contract to define how the contract functions, what data it can store, what other contracts it interacts with, and what external APIs it might call.
-
Compile: Pass your smart contract code through a compiler to translate the contract into byte code that the blockchain can understand. For example, Solidity code must be compiled before it can run in the Ethereum Virtual Machine.
-
Deploy: Send the compiled smart contract to the blockchain. From that point forward, the contract cannot be altered. However, you can still interact with the contract in several ways.
-
Run functions: When you run the functions that you defined for the contract, the network processes those functions and modifies the state of your contract. For some functions, the network charges a small fee to complete the work. Your contract can also have functions that transfer funds to other contracts or wallets.
This guide walks you through each step.
Steps to implement
1 Install and fund your MetaMask wallet
Deploying smart contracts onchain requires a wallet and ETH. The ETH pays for the work required by the Ethereum network to add the contract to the blockchain and store the variables. The wallet holds the ETH that you need to pay for the transaction. Install MetaMask, configure it to use the Sepolia testnet, and fund your wallet with free testnet ETH.
-
Install and configure the MetaMask extension in your browser.
-
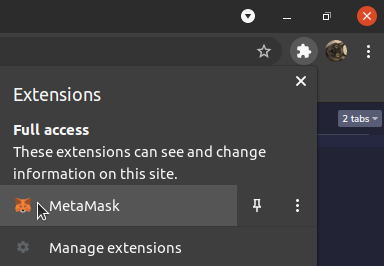
After you install the extension, open your browser extension list and click MetaMask to open MetaMask.
-
Follow the instructions in MetaMask to create a new MetaMask wallet. The new wallet includes a 12-word mnemonic phrase. This phrase is the key to your wallet. Copy that phrase down in a very secure location that only you can access. You can use this phrase to retrieve your wallet later or add it to another browser.
-
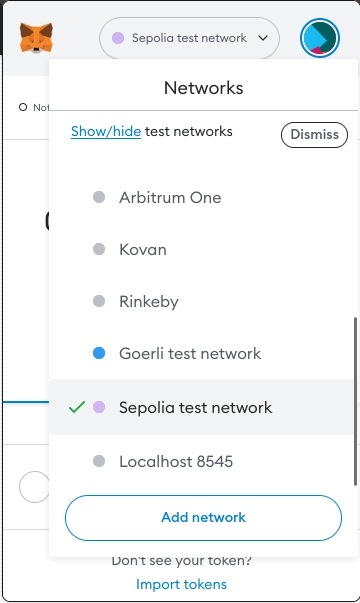
Set MetaMask to use the Sepolia test network.
-
Go to faucets.chain.link and follow the steps to send testnet ETH to your MetaMask wallet address. After the faucet completes the transaction, you should have testnet ETH in your MetaMask wallet on the Sepolia testnet. Optionally, you can get testnet ETH from one of the alternative faucets.
Now that you configured your wallet and funded it with testnet ETH, you can write, compile, and deploy your contract.
2 Write, compile, and deploy your first smart contract
Your first contract is a simple HelloWorld.sol example. This example shows you how to set and retrieve variables in a smart contract onchain.
// SPDX-License-Identifier: MIT

pragma solidity 0.8.7;

/**
 * THIS IS AN EXAMPLE CONTRACT THAT USES UN-AUDITED CODE.
 * DO NOT USE THIS CODE IN PRODUCTION.
 */
contract HelloWorld {
  string public message;

  constructor(
    string memory initialMessage
  ) {
    message = initialMessage;
  }

  function updateMessage(
    string memory newMessage
  ) public {
    message = newMessage;
  }
}
-
Open the example contract in the Remix IDE. Remix opens and shows the contents of the smart contract. You can modify the code in this editor when you write your own contract.
-
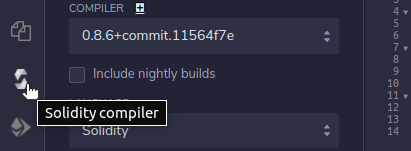
Because the code is already written, you can start the compile step. On the left side of Remix, click the Solidity Compiler tab to view the compiler settings.
-
For this contract, use the default compiler settings. Click the Compile HelloWorld.sol button to compile the contract. This converts the contract from Solidity into bytecode that the Ethereum Virtual Machine can understand. Remix automatically detects the correct compiler version depending on the
pragmathat you specify in the contract.
-
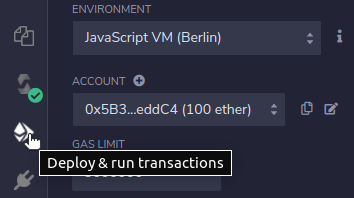
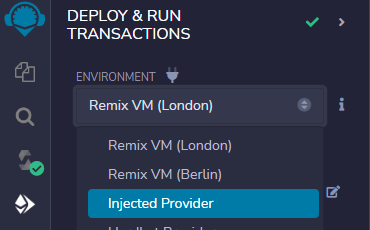
After Remix compiles the contract, deploy it. On the left side of Remix, click the Deploy and Run tab to view the deployment settings.
-
In the deployment settings, select the Injected Provider environment. This tells Remix that you want to deploy your contract to the blockchain that you configured in MetaMask. You could optionally use one of the Javascript VM options, but they run in a virtual environment with no connection to an actual blockchain or Chainlink oracles.
-
Next to the Deploy button, enter a message that you want to send with the smart contract when you deploy it. This contract has a constructor that sets an initial message when you deploy the contract.
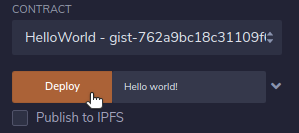
-
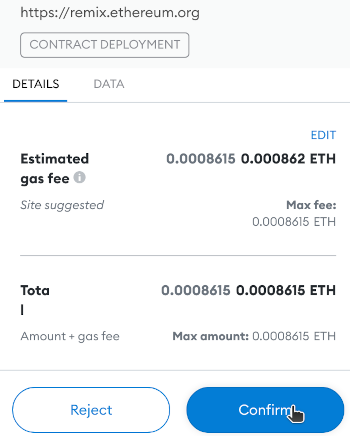
Click the Deploy button to deploy the contract and its initial message to the blockchain network. MetaMask opens and asks you to confirm payment to deploy the contract. Make sure MetaMask is set to the Sepolia network before you accept the transaction. Because these transactions are on the blockchain, they are not reversible.
-
In the MetaMask prompt, click Confirm to approve the transaction and spend your testnet ETH required to deploy the contract.
-
After a few seconds, the transaction completes and your contract appears under the Deployed Contracts list in Remix. Click the contract dropdown to view its variables and functions.
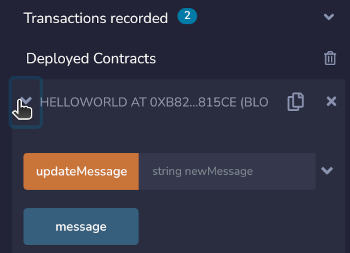
-
Click the
messagevariable. Remix retrieves and prints the initial message that you set.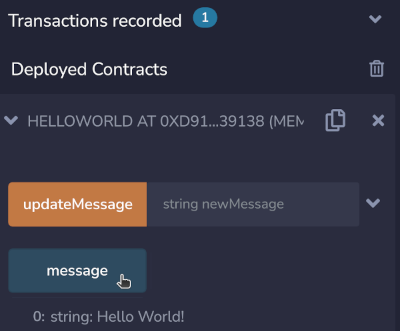
The contract has an address just like your wallet address. If you save this address, you can return to your deployed contract at any time to retrieve variables or execute functions. To see details about your deployed contract, copy the contract address from the list in Remix and search for it in the Etherscan Sepolia Testnet Explorer.
3 Run functions in your contract
Because you deployed the contract to an actual blockchain, several nodes on the test network confirmed your payment for the smart contract. The contract, its variables, and its functions remain in the blockchain permanently. To change the message variable that is stored with your contract, run the updateMessage function.
-
In your deployed contract, enter a new message next to the
updateMessagefunction.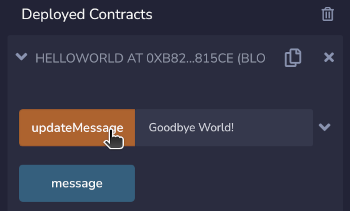
-
Click the
updateMessagebutton to set the new message in the contract data. MetaMask opens and asks you to confirm payment to update the state of your contract. -
In the new MetaMask prompt, click Confirm to approve the transaction.
-
Click the
messagevariable again to see the updated value. It might take a few seconds before the transaction updates the variable.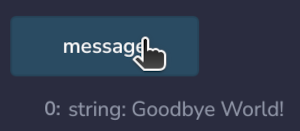
Now you know how to deploy example contracts to a test network and run the functions in those contracts. You can write your own contracts and test them using this same process.
Next, read the Consuming Data Feeds guide to learn how to connect your smart contracts to Chainlink Data Feeds and retrieve onchain data that your smart contracts can act on.