
Overview
The Giveaway Manager app is a highly configurable proof of concept for provably-fair giveaways using Chainlink Automation and VRF. It is capable of drawing winners from a CSV list or onchain entries using VRF Direct Funding and Automation. Fulfillment is not included, and this app demonstrates provably fair selection only.

Objective
In this tutorial, you will deploy a local user interface to enable giveaways using Chainlink VRFv2 Direct Funding. The UI was designed to run simple drawings and giveaways with just a CSV list of participants. Chainlink Automation provisioning and setup are also covered to enable timed-based, dynamic drawings.
You can use this to run:
- Static Giveaways: Fairly and transparently pick winners from a participant list in CSV format. Unique participant IDs can be anything (emails, numbers, addresses). They are hashed so no user data is stored onchain.
- Dynamic Giveaways: Create a giveaway that participants can enter on their own via tx, then fairly and transparently pick winners whenever you'd like. This allows participants to register over a set period of time without the admin needing a full participant list like a static giveaway.
Before you begin
Before you start this tutorial, complete the following items:
- Set up a cryptocurrency wallet such as MetaMask.
- Fund your wallet with the following testnet tokens:
- Request ERC-677 testnet LINK and Sepolia ETH from faucets.chain.link/sepolia. You will need at least 5.1 LINK to set up each giveaway with this app.
Steps to implement
2 Create a block explorer API key
The recommended networks for this app are:
- Ethereum mainnet and Sepolia testnet
For demo purposes, use Sepolia for this tutorial. Create a block explorer API key to verify contracts on your preferred network:
3 Set contract environment variables
-
Prepare the following values:
- The RPC URL for your deployment network, using an RPC node provider such as Infura or Alchemy.
- The private key for your deployer account. If your deployer account is in MetaMask, export your private key from MetaMask.
- The block explorer API key from Etherscan that you created earlier.
Parameter Description Example NETWORK_RPC_URLThe RPC URL for the network you want to deploy to. https://eth-sepolia.g.alchemy.com/v2/your-api-keyPRIVATE_KEYThe private key of the account you want to deploy from.
Add0xbefore your key.0xabc123abc123abc123abc123abc123...EXPLORER_KEYThe block explorer API key needed for contract verification. ABC123ABC123ABC123ABC123ABC123ABC1 -
In the
contractsdirectory, create a.envfile for your contract environment variables:# <root>/contracts $ touch .env $ open .envIf you're going to push this to your own repo, make sure this
.envfile is untracked, and consider using a secure env management package instead. -
Add this content to your file and fill in the values. Do not use quotation marks when filling in the values. Add
0xto the beginning of your private key.# Do NOT use quotes to assign values! # Network RPCs export RPC_URL= # Private key for contract deployment export PRIVATE_KEY= # Explorer API key used to verify contracts export EXPLORER_KEY=
4 Install Foundry
Refer to the Foundry installation instructions.
-
Download foundryup:
# Download foundry $ curl -L https://foundry.paradigm.xyz | bash -
Restart your terminal session, then install Foundry by running:
foundryup
5 Install contract dependencies
Install GNU make if you do not already have it. The functionality of the project is wrapped in the makefile. Reference the below commands based on your OS or go to Make documentation.
macOS
- The Xcode command line tools include
make. If you've previously installed Xcode, skip to step 2 to verify your installation. Otherwise, open a Terminal window and run:
Alternatively, if you prefer to use Homebrew, be aware that GNUxcode-select --installmakeis installed asgmake. - Verify your
makeinstallation:
Ifmakemakeis installed successfully, you will get the following output:make: *** No targets specified or no makefile found. Stop.
Windows
- If you're using WSL, open an Ubuntu terminal and run:
sudo apt install make - Edit your path variable to include
make. - Verify your
makeinstallation:
Ifmakemakeis installed successfully, you will get the following output:make: *** No targets specified or no makefile found. Stop.
Install contract dependencies if changes have been made to contracts:
# <root>/contracts
$ make install
6 Deploy contract
# <root>/contracts
$ make deploy
Save the deployed contract address from your terminal output. This is the giveaway contract manager address that you will need when you run the UI. Scroll up in the terminal output and look for your contract address, which appears shortly after the Success message:
##### sepolia
✅  [Success]Hash: 0x050ec798d7205c41bafa91029fcdd30104b99c17003a59ac033099dbe47d3658
Contract Address: 0xA168A5eAd28d5E4C1C9cEaF6492a0F9D715ea8D8
Block: 5727377
Paid: 0.005473916599834344 ETH (5470873 gas * 1.000556328 gwei)
7 Install UI dependencies
-
To install the UI dependencies, navigate to the
clientdirectory and run:# <root>/client # (Mac) you may need to run 'source ~/.nvm/nvm.sh' nvm useYou may be prompted to install
nvmand node v14.17.4. This process takes a few minutes. -
After your node version is set, run:
yarn
8 Run and view the UI
Set environment variables to run the UI and then view it locally.
-
Prepare your UI environment variables. These are needed for each time you want to run the UI:
Item Value UI_GIVEAWAY_MANAGER_CONTRACT_ADDRESSThe address of the Giveaway Contract Manager contract that you deployed earlier UI_LINK_TOKEN_CONTRACT_ADDRESSFor Ethereum Sepolia: 0x779877A7B0D9E8603169DdbD7836e478b4624789
See all LINK token contract addressesUI_KEEPER_REGISTRY_CONTRACT_ADDRESSFor Ethereum Sepolia: 0xE16Df59B887e3Caa439E0b29B42bA2e7976FD8b2
This app currently supports Automation v1.2. See all Automation registry contract addresses -
Navigate to the
/client/packages/uidirectory, and run these commands to set up your UI environment variables. Do not use quotes to assign values:# <root>/client/packages/ui export UI_GIVEAWAY_MANAGER_CONTRACT_ADDRESS= export UI_LINK_TOKEN_CONTRACT_ADDRESS=0x779877A7B0D9E8603169DdbD7836e478b4624789 export UI_KEEPER_REGISTRY_CONTRACT_ADDRESS=0xE16Df59B887e3Caa439E0b29B42bA2e7976FD8b2 -
After setting the environment variables, run the UI locally:
yarn start -
To view the UI, open your browser at localhost:3005.
9 Implement a static giveaway
-
Navigate to http://localhost:3005/ in your browser.
-
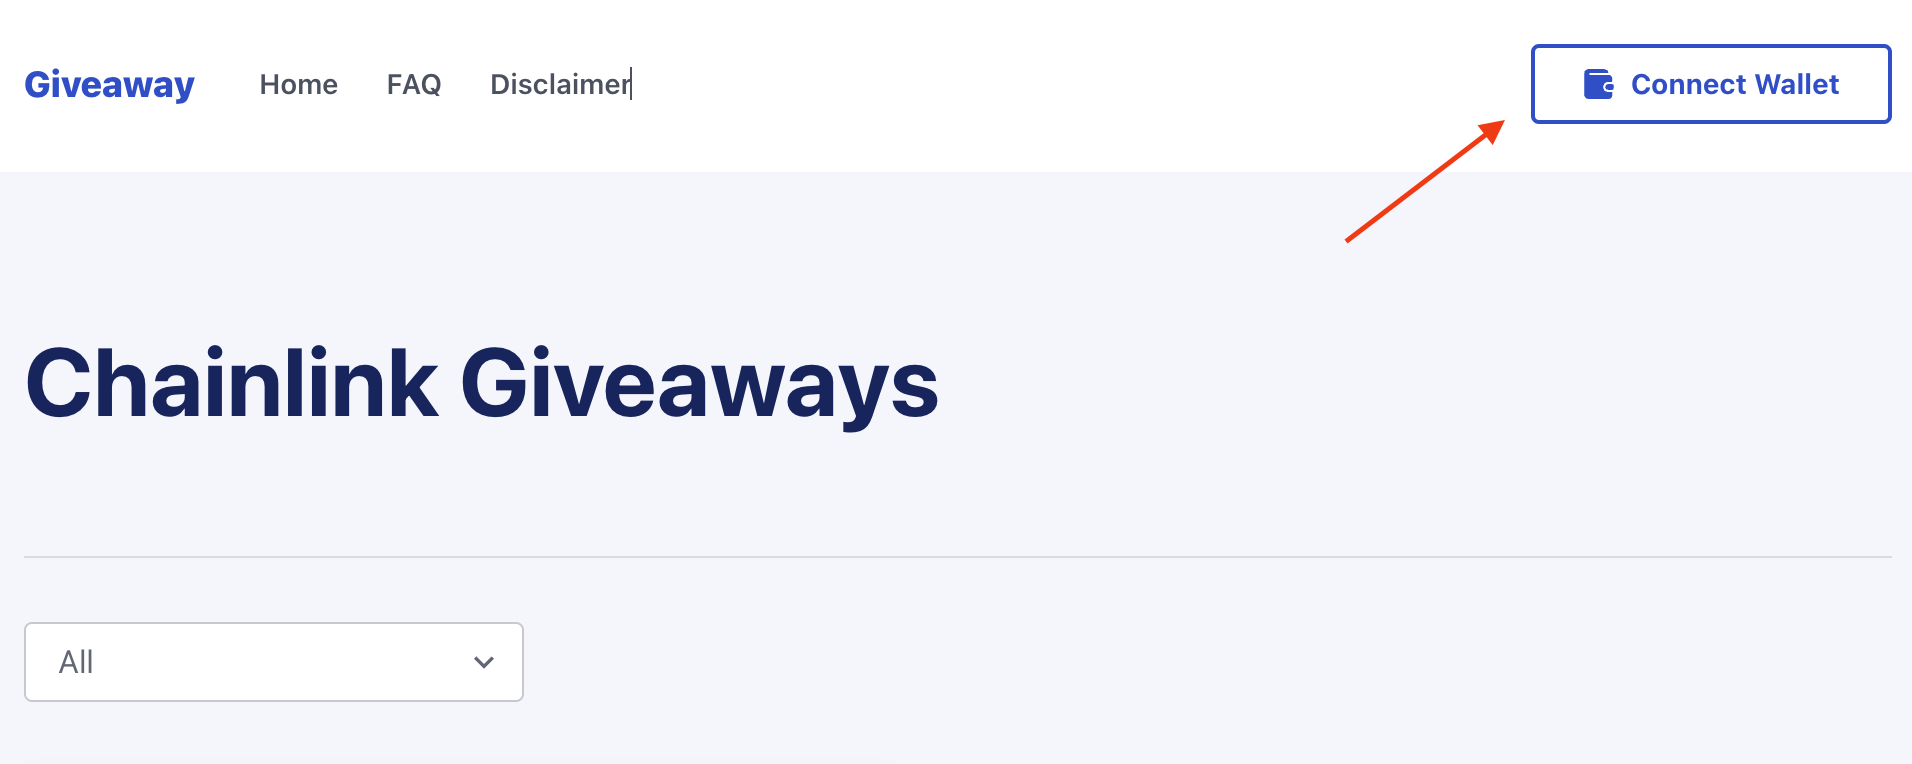
In the upper right corner, click Connect wallet. Connect your wallet and ensure the proper network is selected.
-
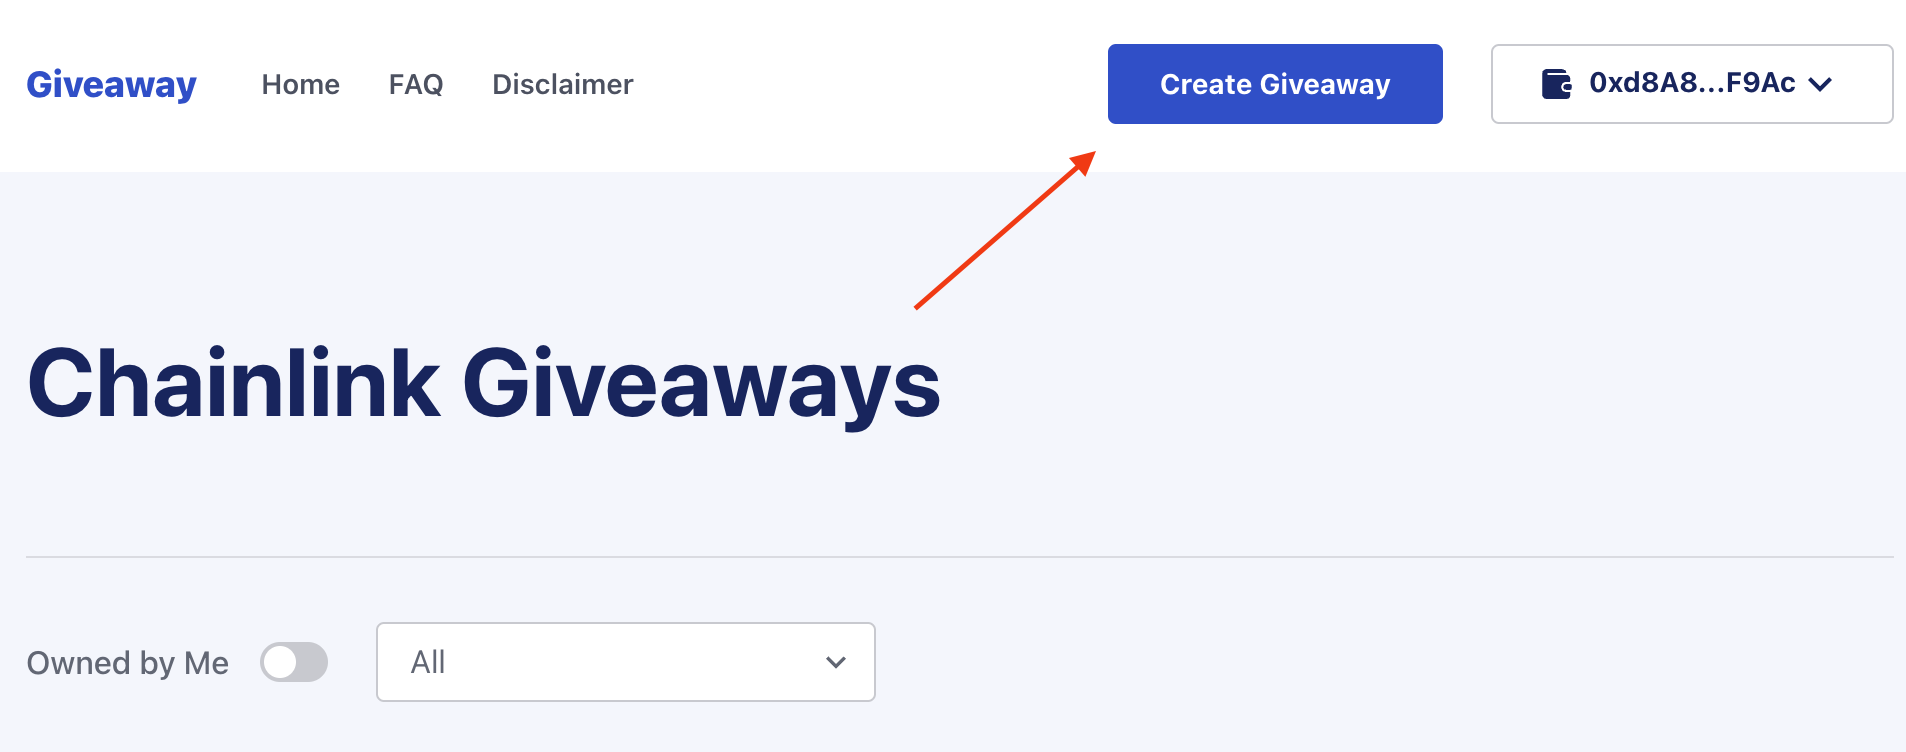
Click Create giveaway.
-
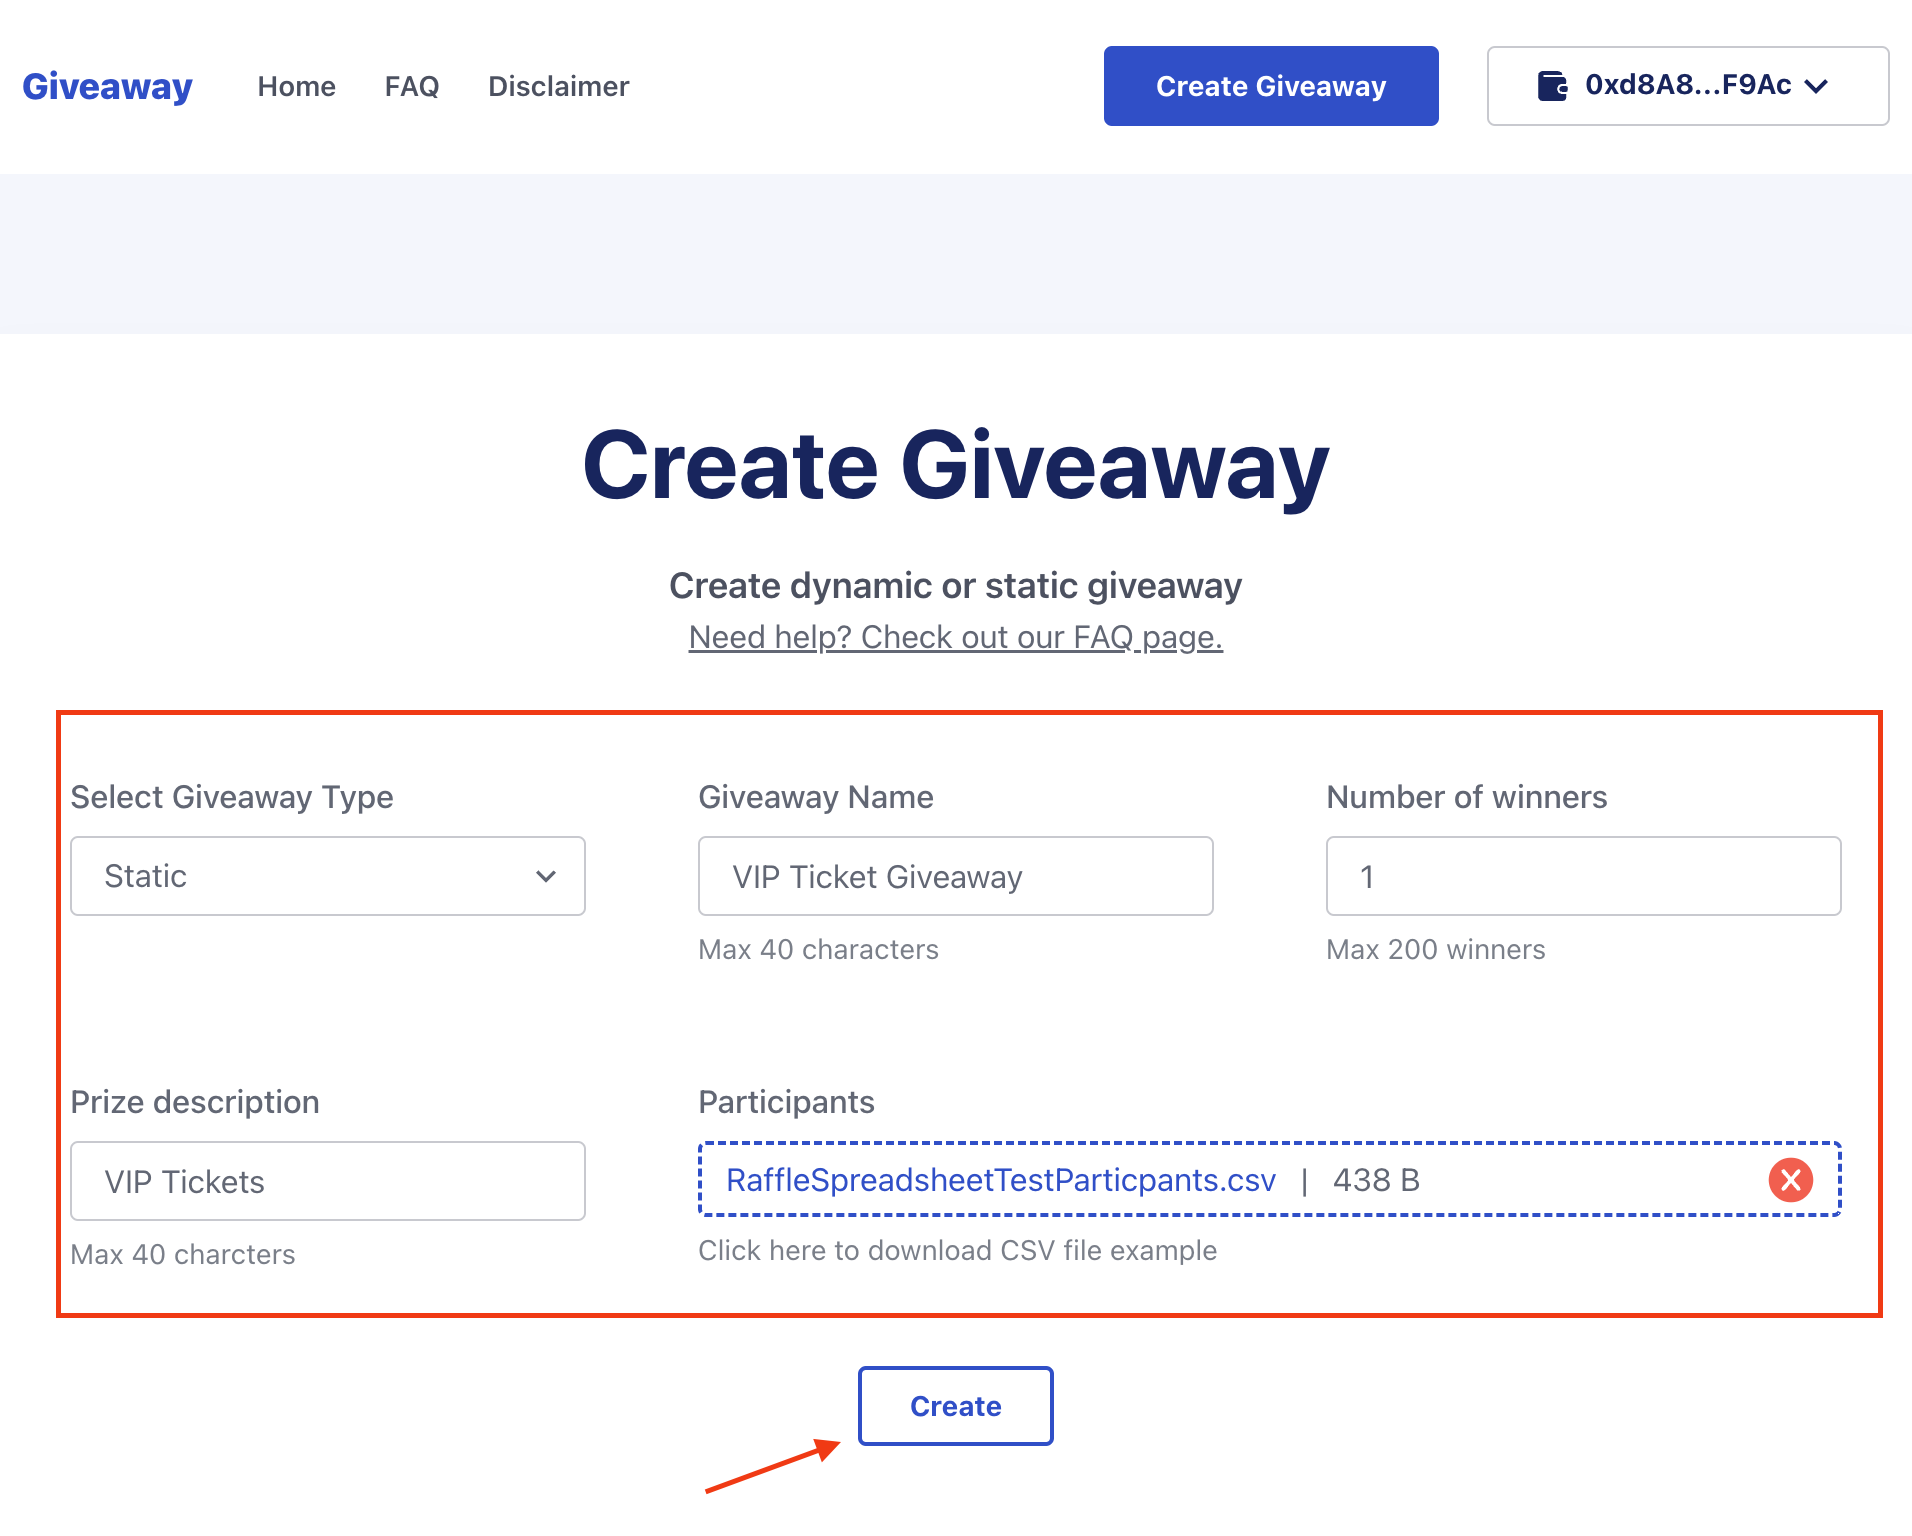
Static giveaway is selected by default. Fill in the details to configure the giveaway:
- Create a CSV file with a list of giveaway participants. Below the Participants field, download the example CSV participant file and fill it in. For testing, you can use a list of dummy wallet addresses.
- Fill in the rest of the fields and upload your CSV list of participants, then Create and confirm the wallet transaction that pops up.
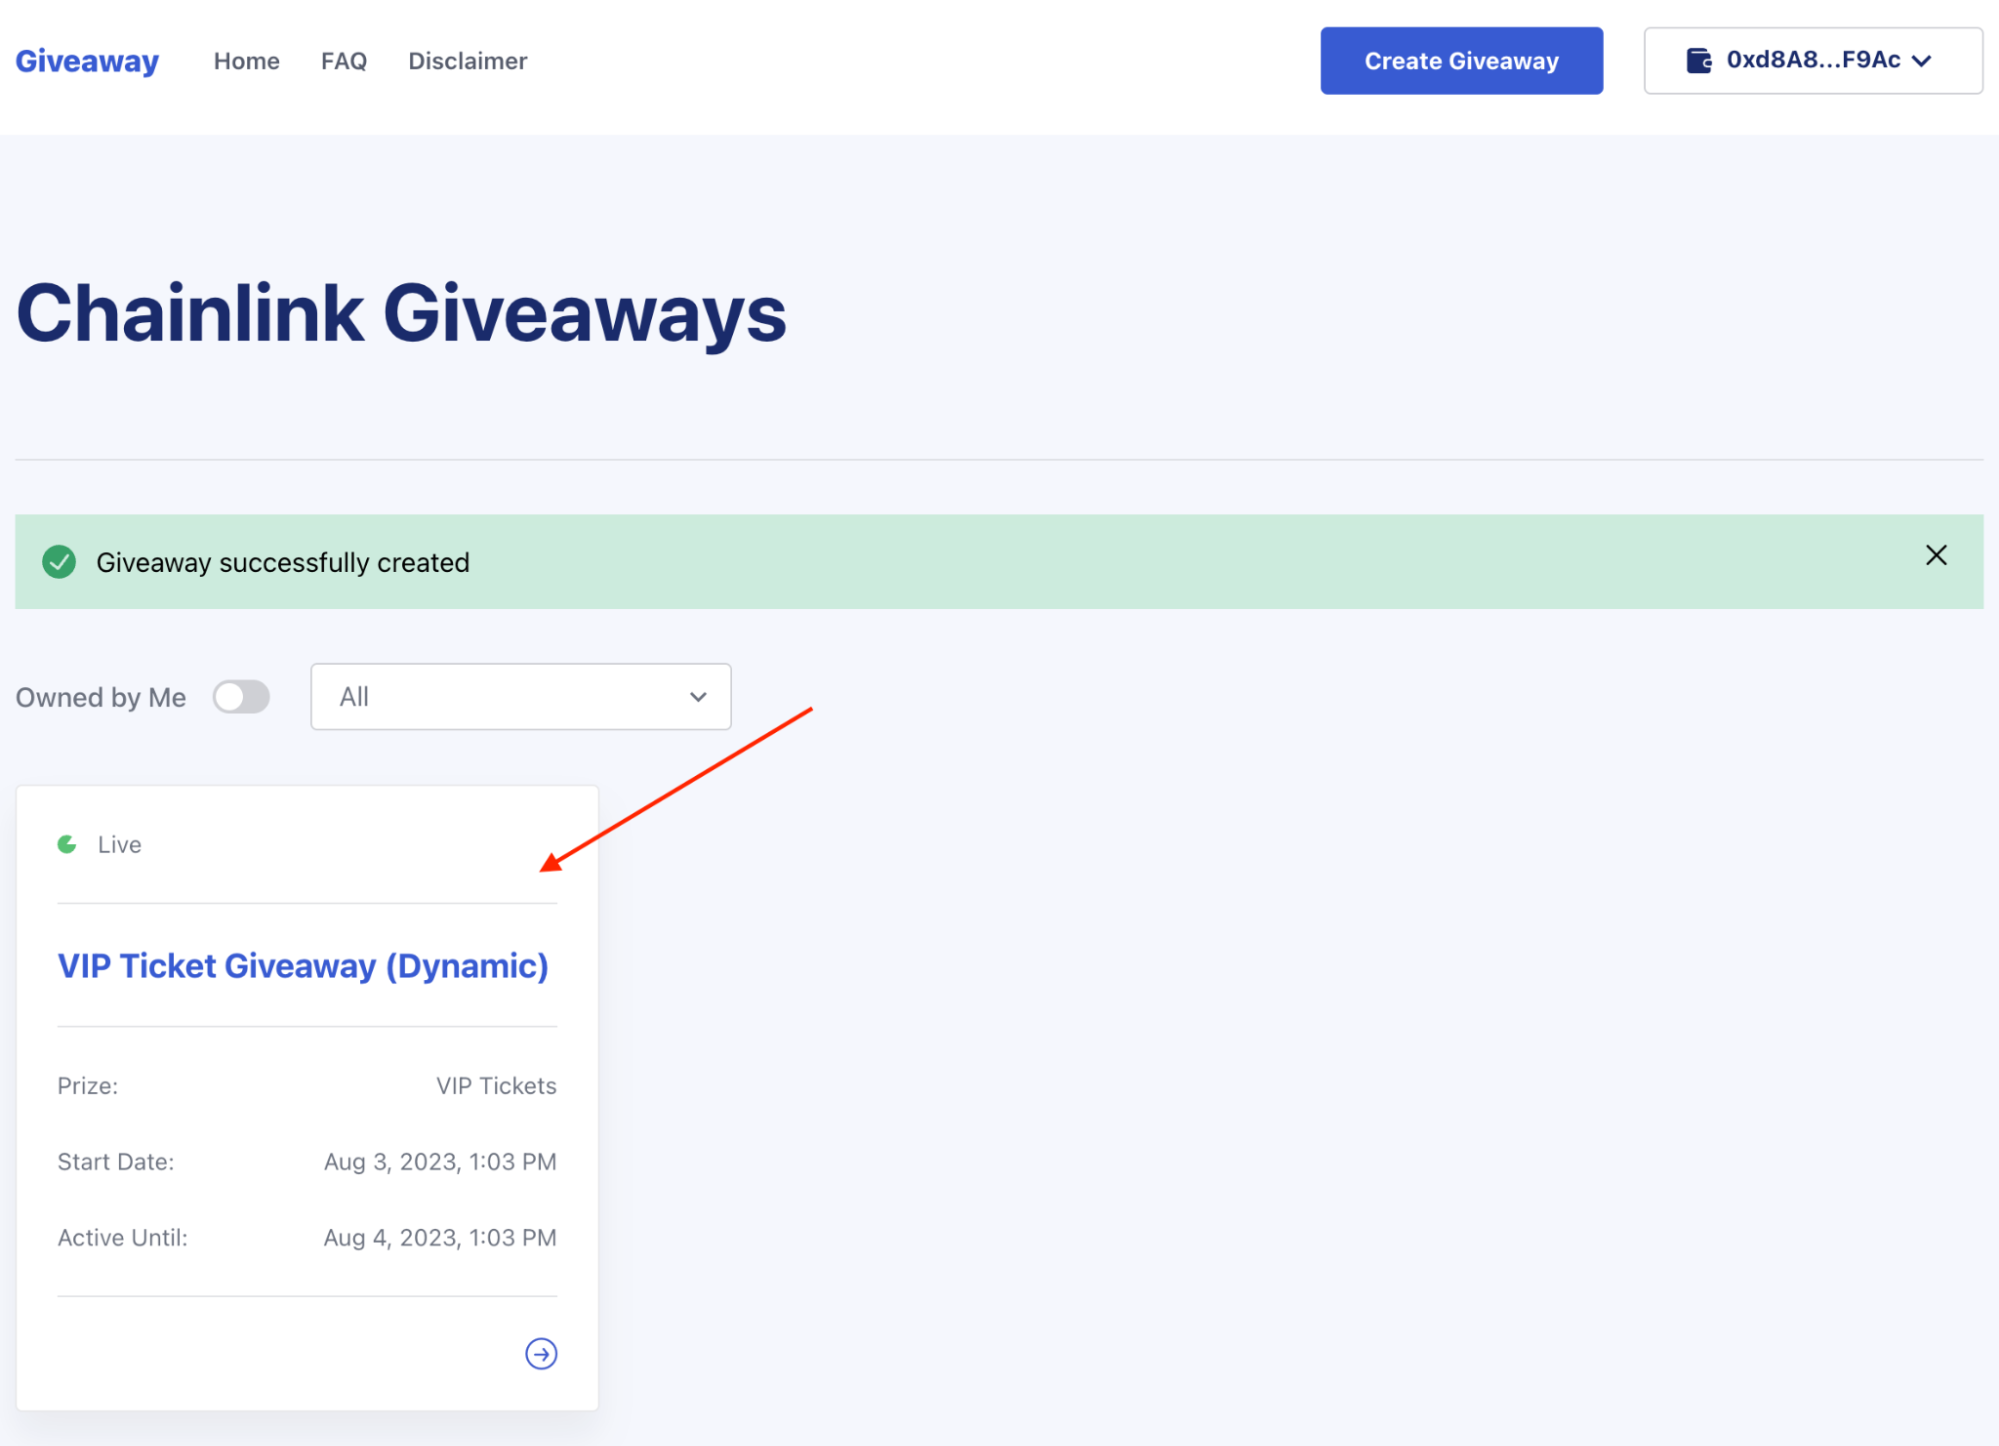
-
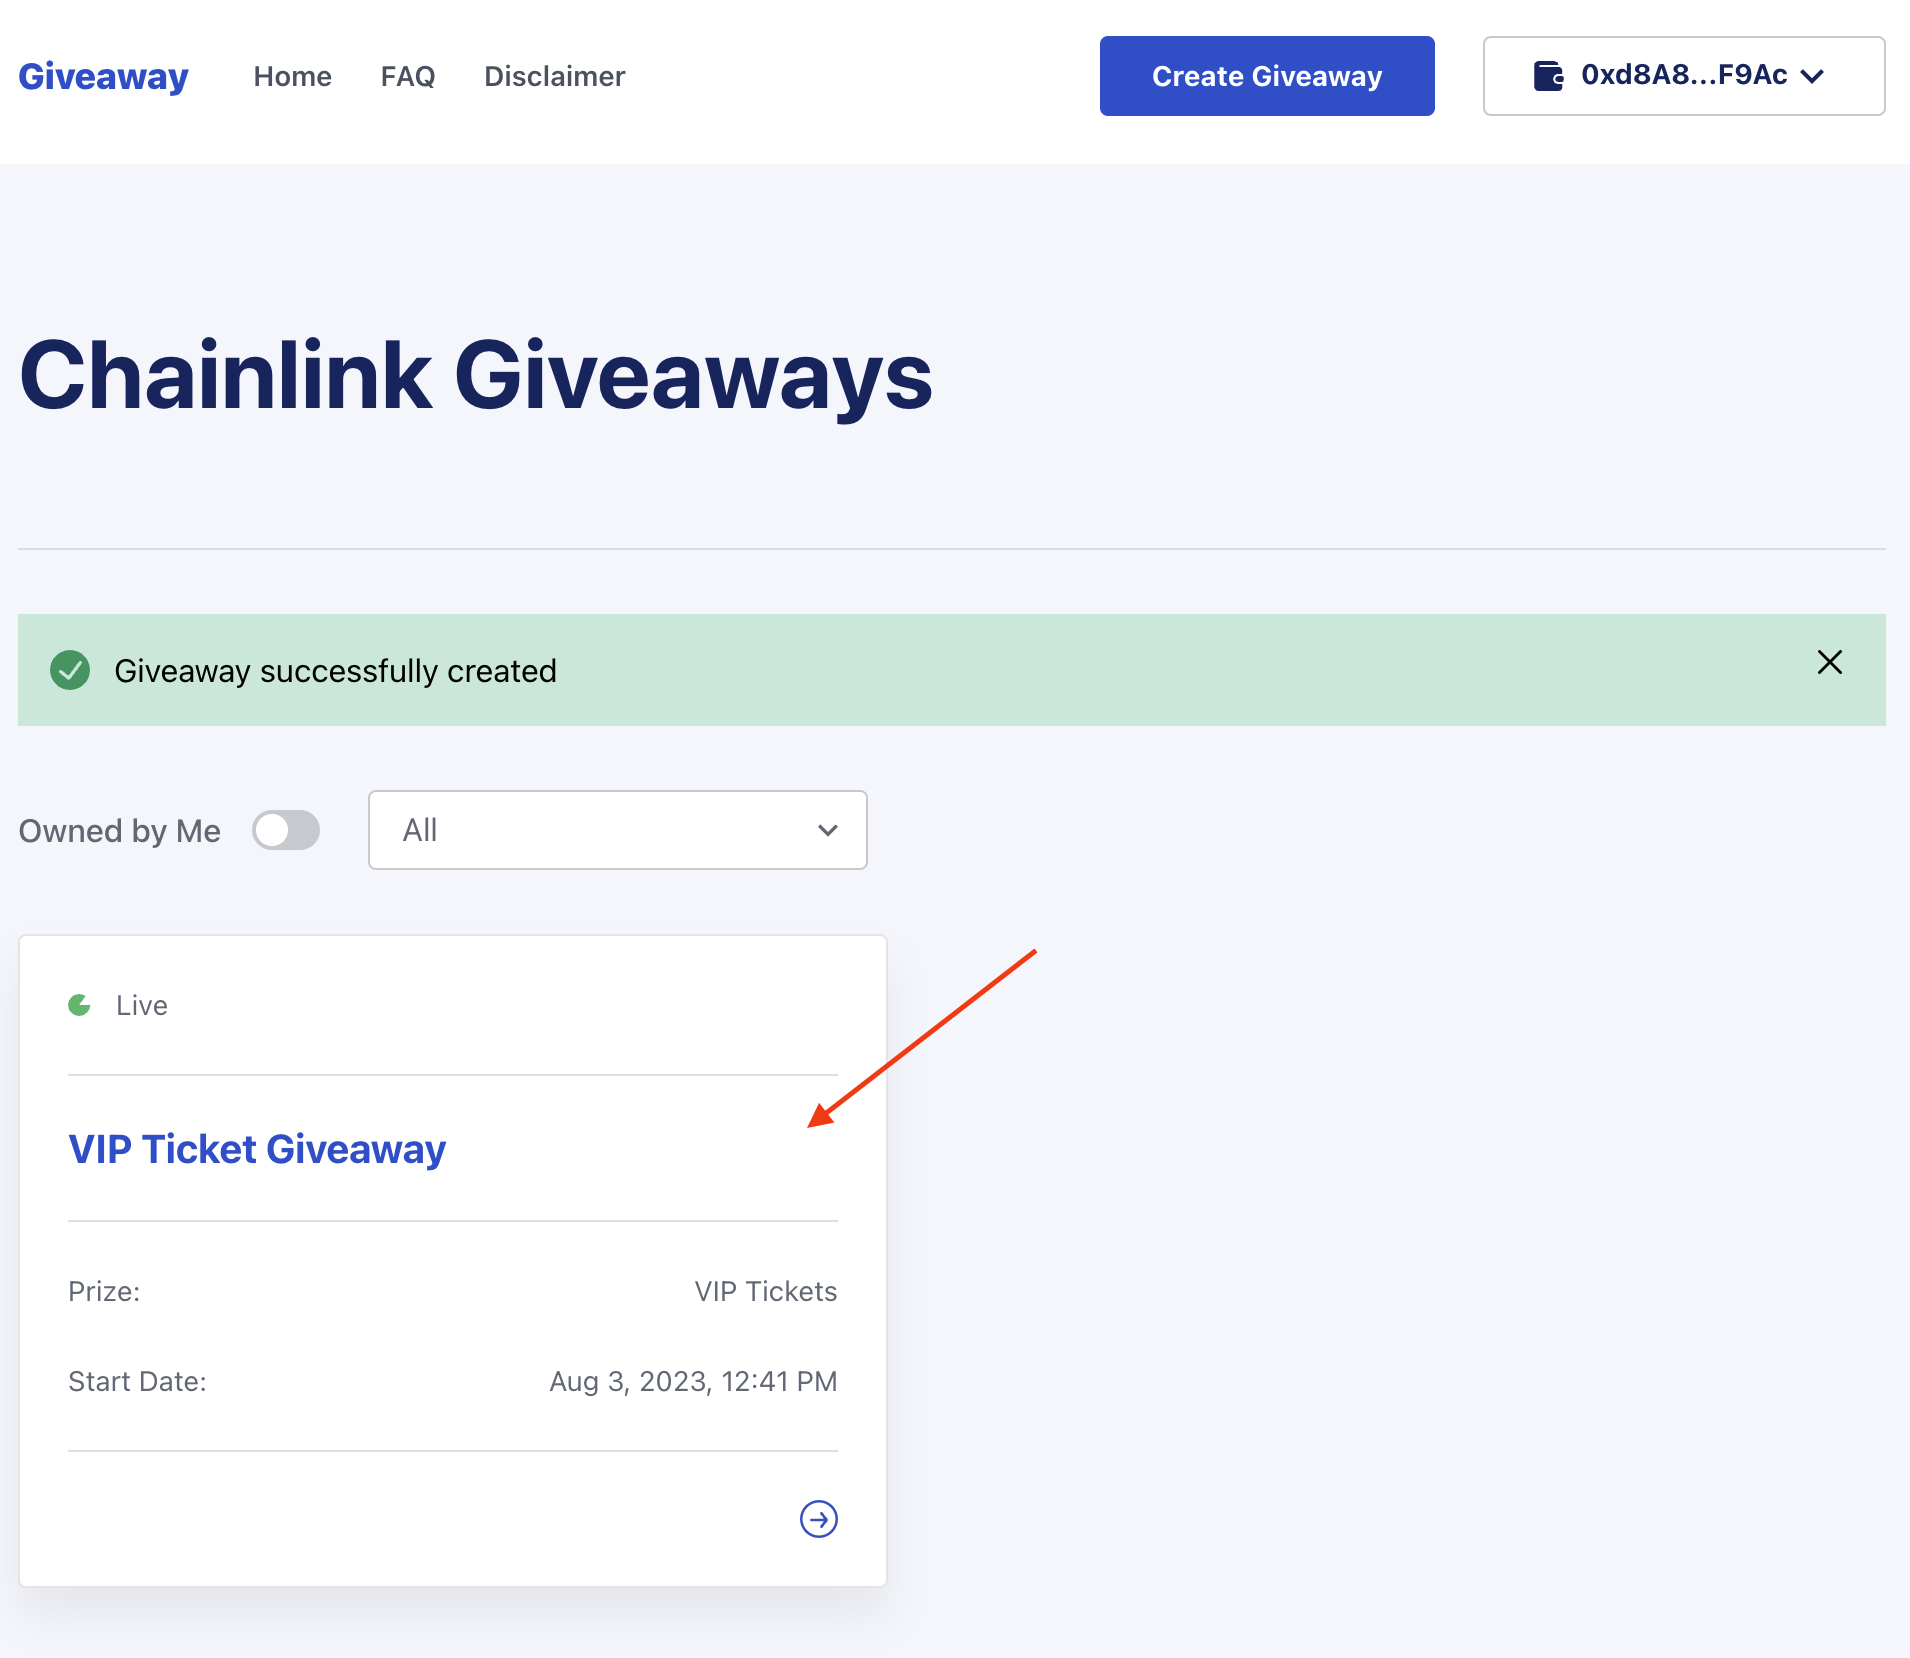
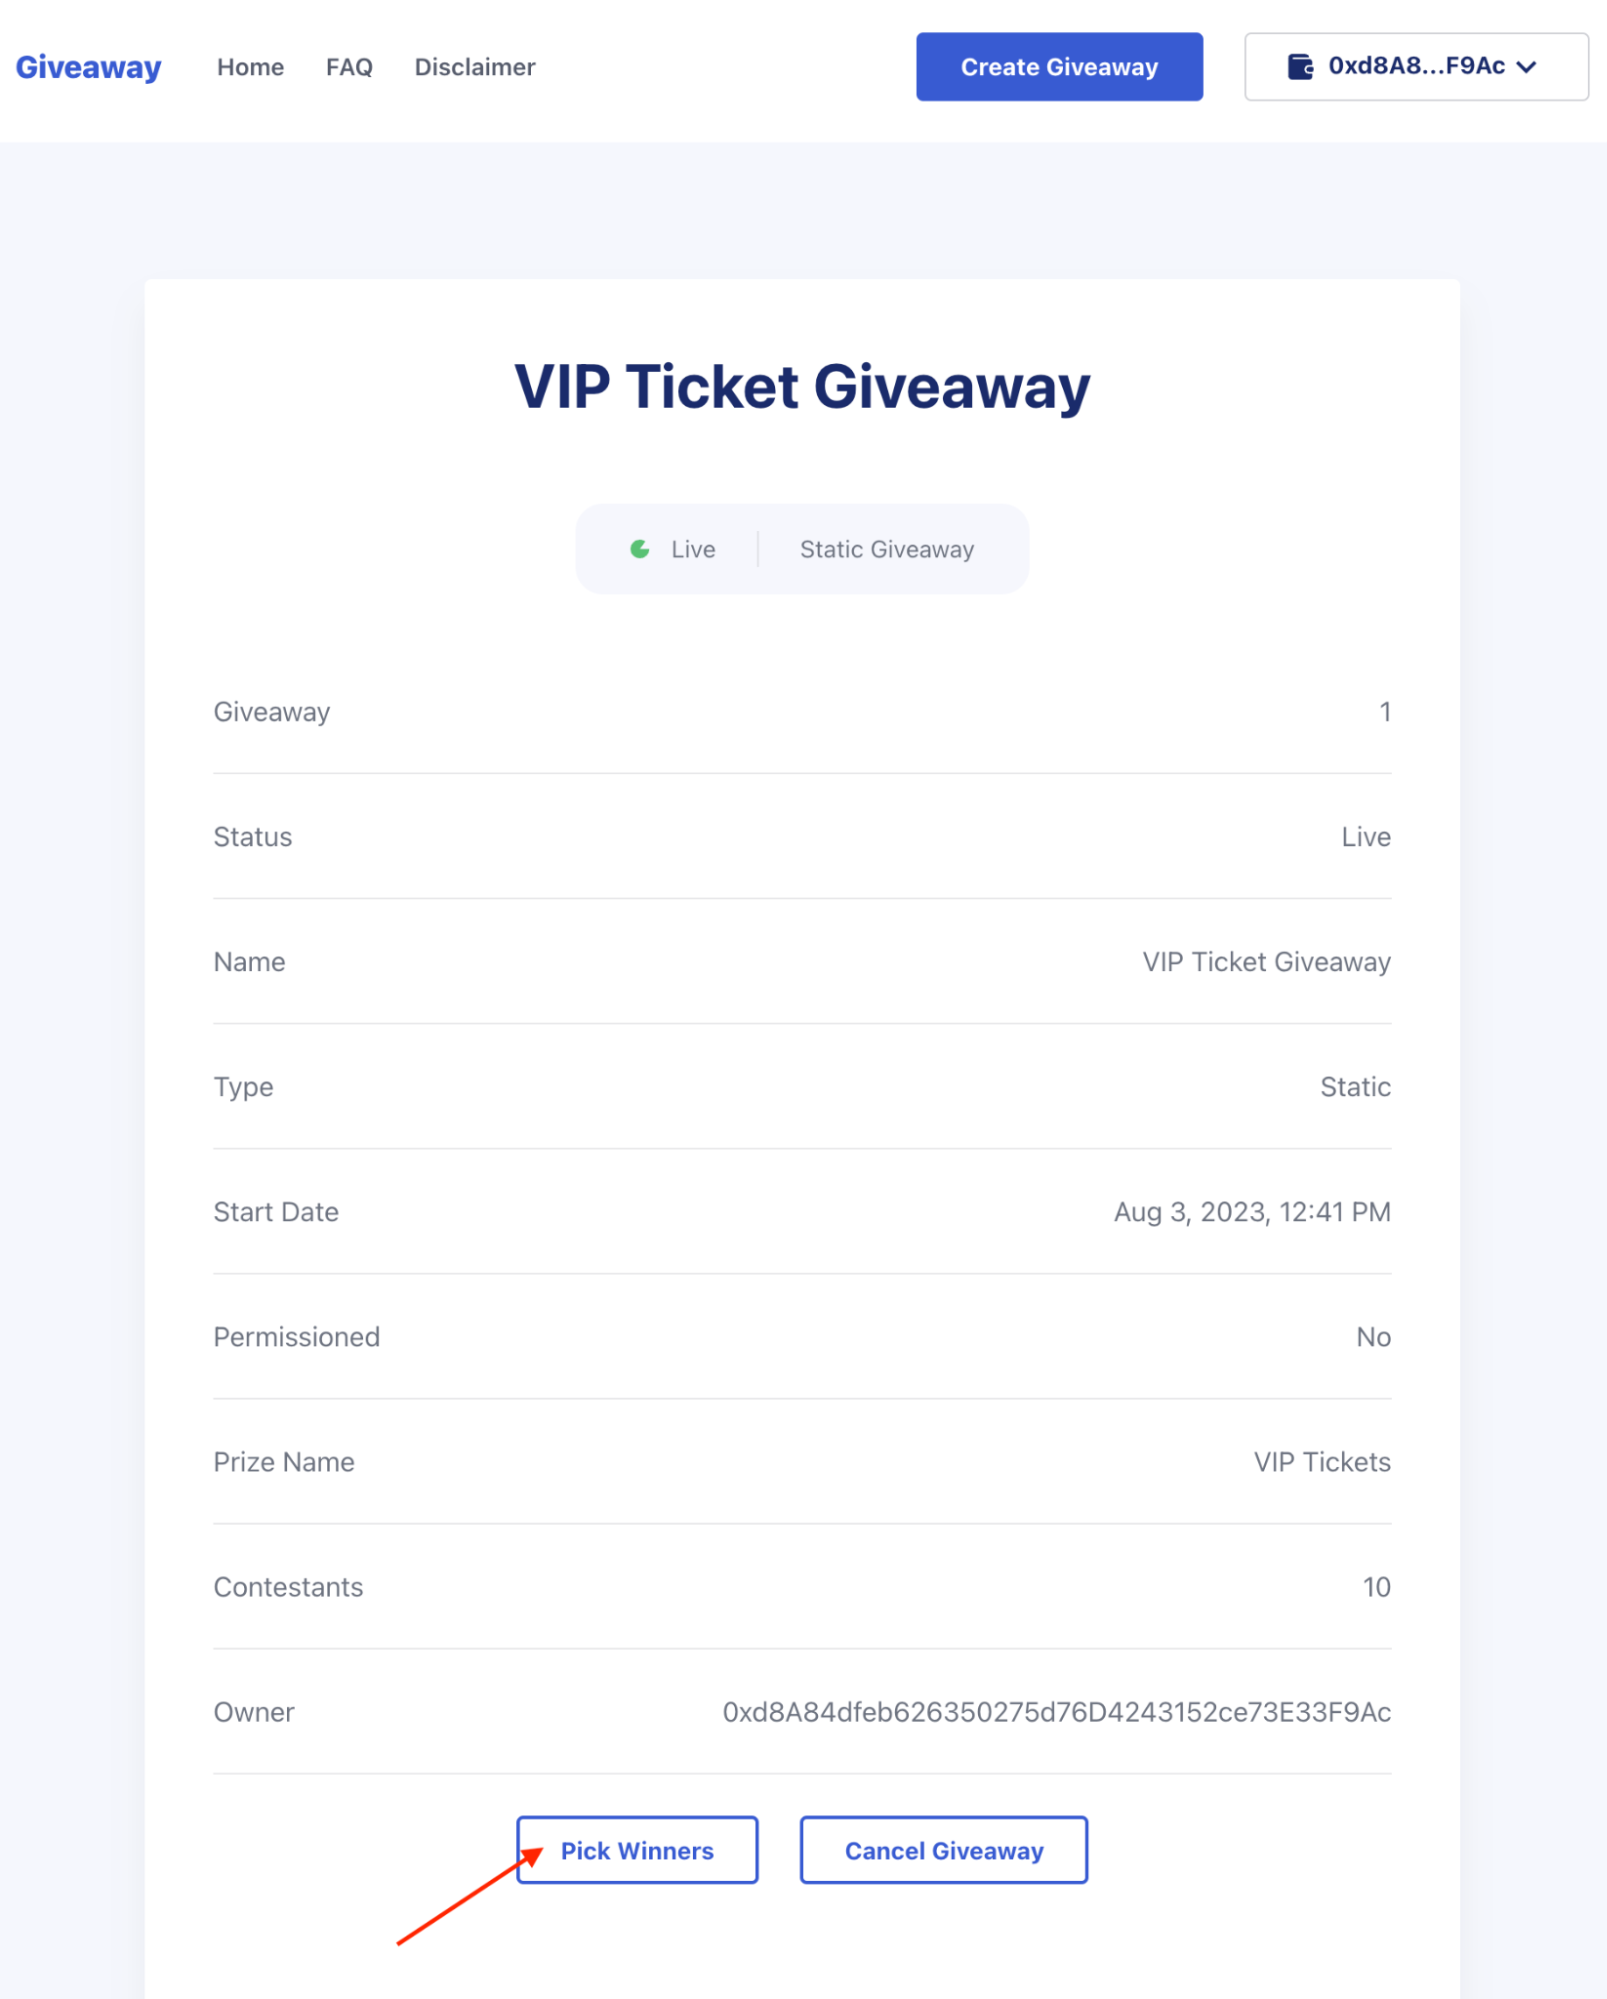
After the transaction processes, you should get a "Giveaway successfully created" message. Click the UI card for the new giveaway you just created:
-
The details for your giveaway are displayed. Click Pick Winners and confirm the wallet transaction.
-
A "Pending Transaction" popup displays while the transaction is processing. Once the transaction is complete, you should see a "Successfully picked winners" message. Click Close.
- Optional: You can reference the "View VRF Request" link to help prove the giveaway was fair.

-
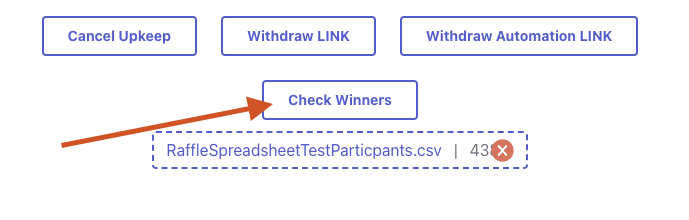
At the bottom of the Giveaway page, upload your original participants (contestants) CSV again to see who won:

-
After you've uploaded the CSV, click Check Winners:
-
A Giveaway winners popup displays and shows the winners. This demo used a CSV of dummy wallet addresses. You can use whichever unique identifiers you want. Since the identifier is hashed before it's put onchain, the data remains private and visible only to you as the admin.
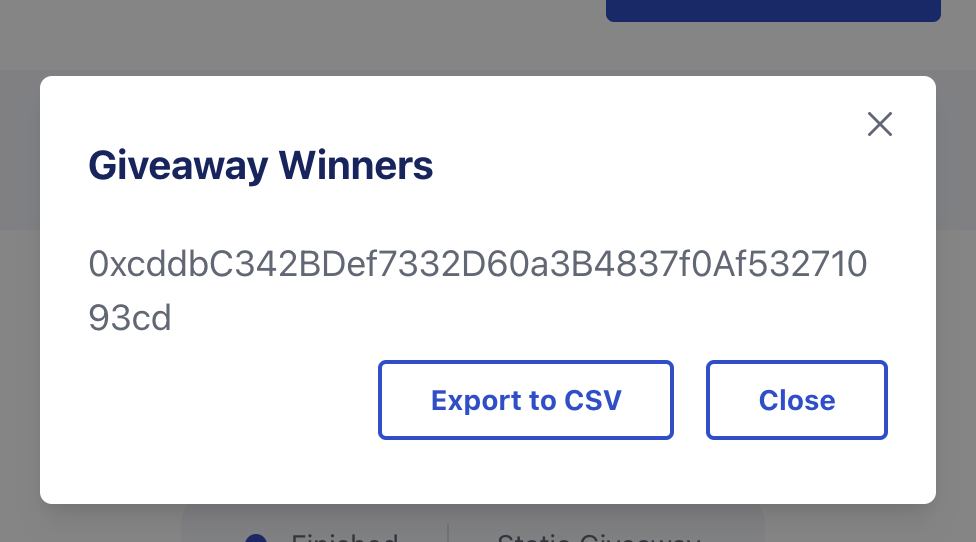
You can export a CSV list of all the winners and share the list with participants if you wish. You can also choose to provide the VRF transaction from Step 7 as evidence that Chainlink VRF was used for fairness.
10 Implement a dynamic giveaway
-
Navigate to http://localhost:3005/ in your browser.
-
In the upper right corner, click Connect wallet. Connect your wallet and ensure the proper network is selected.
-
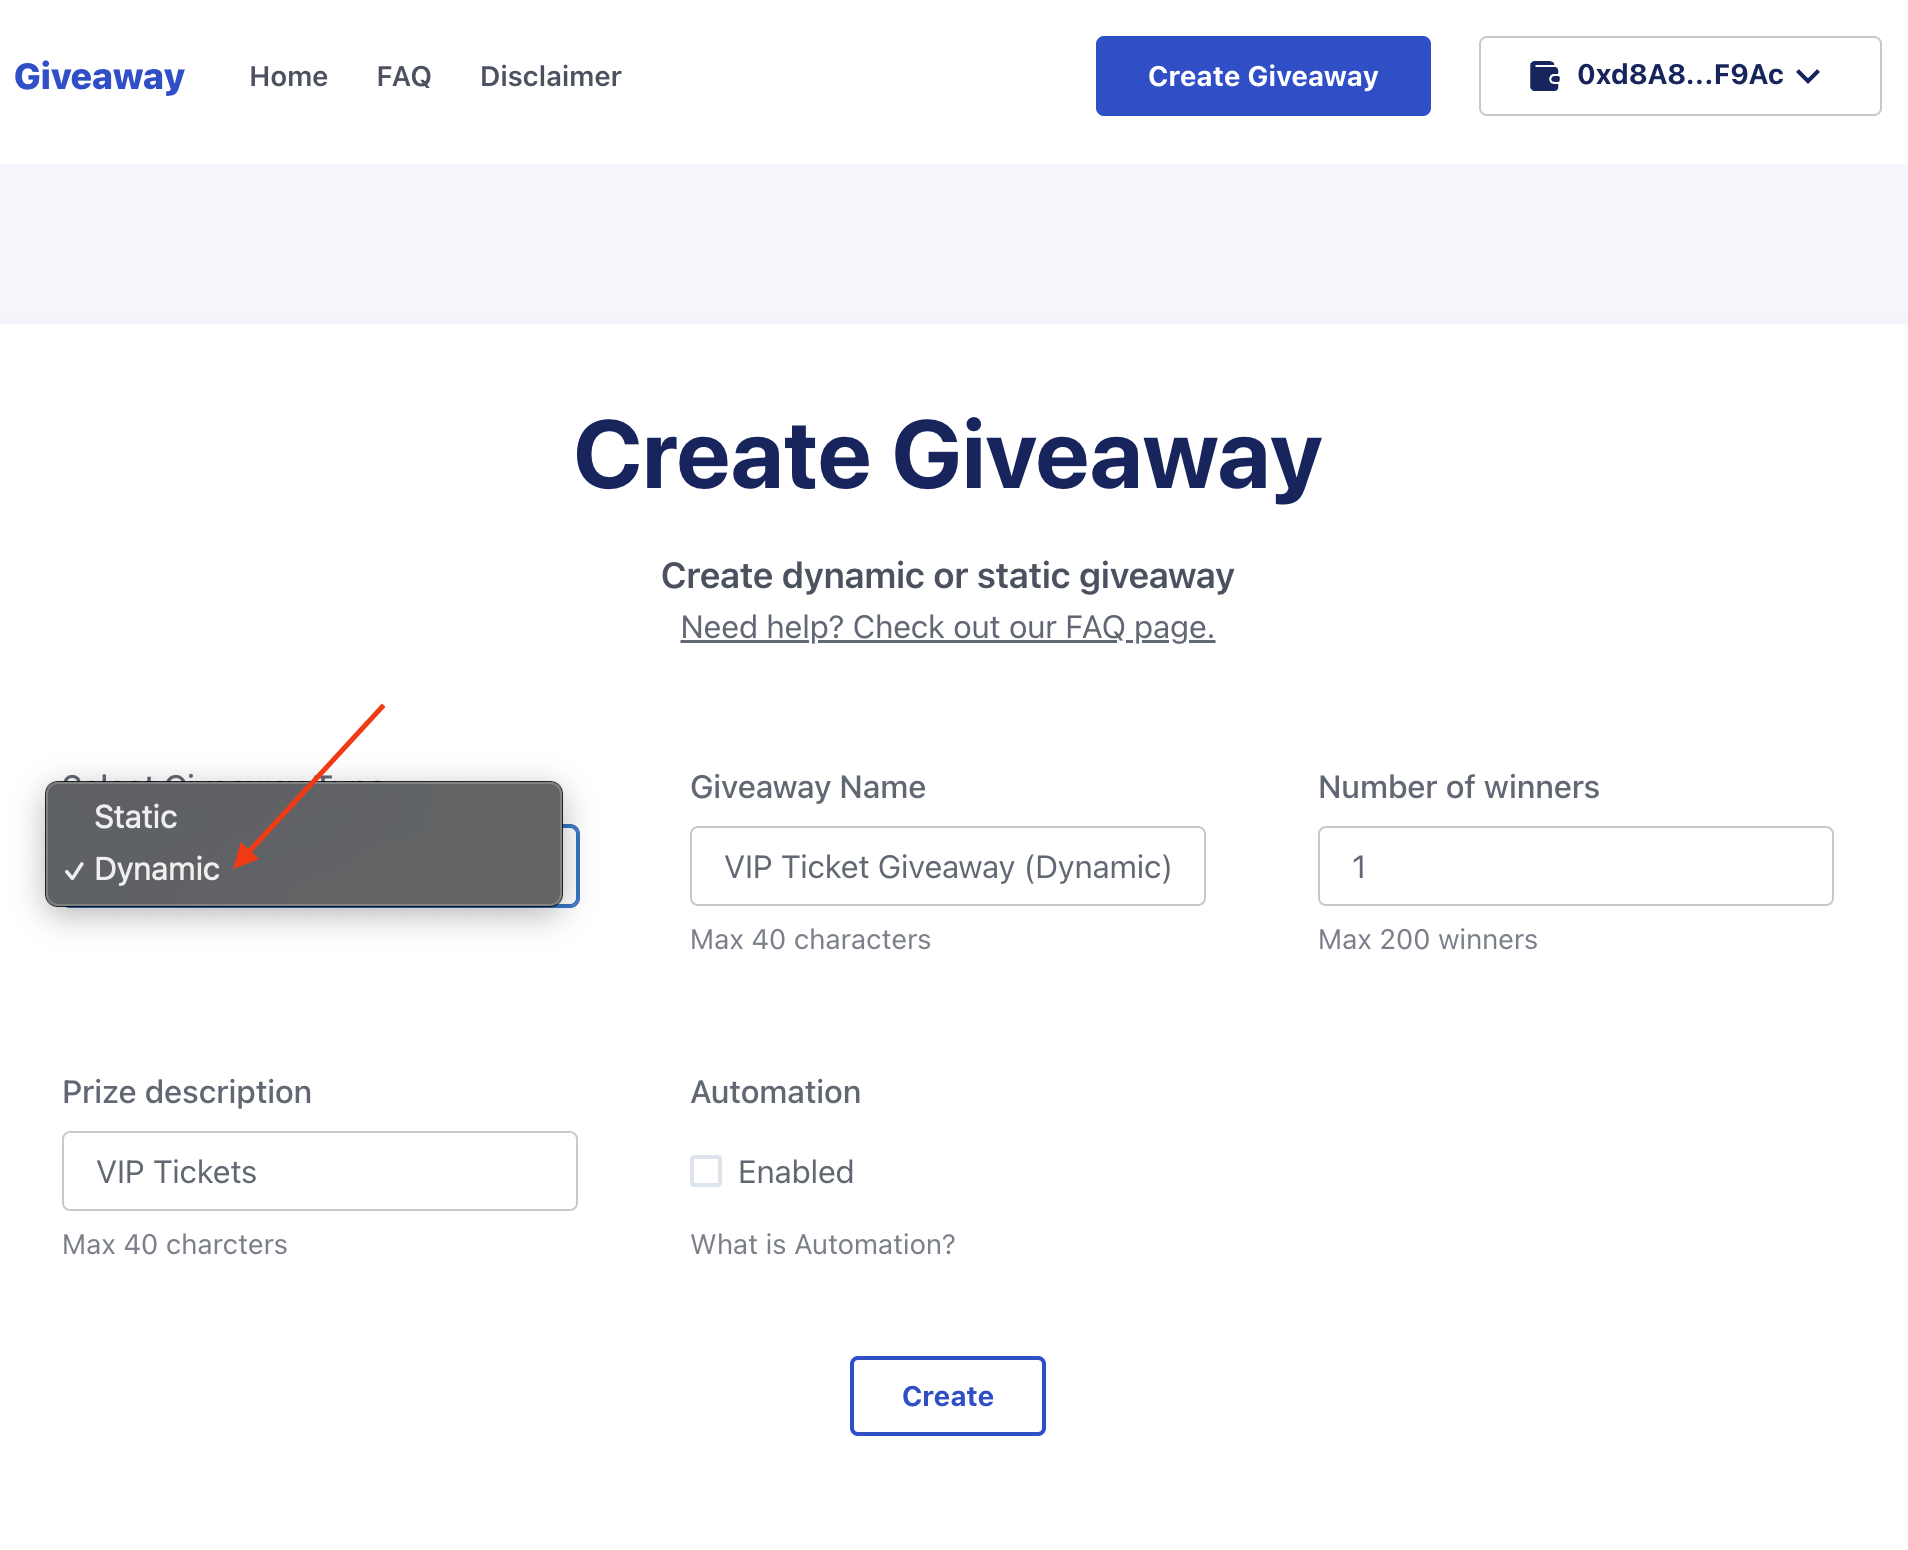
Click Create giveaway.
-
For the Select giveaway type field, click Dynamic.
-
Fill in the details to configure the giveaway:
- If you want the Giveaway to close automatically after a certain duration, click Enable Automation and enter the duration. If you don't do this, you must manually close the Giveaway before drawing.
- Click Create and confirm the wallet transaction that pops up.

-
After the transaction processes, you should get a "Giveaway successfully created" message. Click the UI card for the new giveaway you just created:
-
The details for your giveaway are displayed. At the bottom, there are a few options:
- Join Giveaway: Allows the admin to submit a tx to join the giveaway (useful for some use cases)
- Pick Winners: You can pick the winners at any time, if you specified a duration it will automatically close the giveaway so that nobody can enter anymore. You'll still need to run this to pick the winners.
- Cancel Giveaway: Cancel the giveaway and prevent anyone from entering.

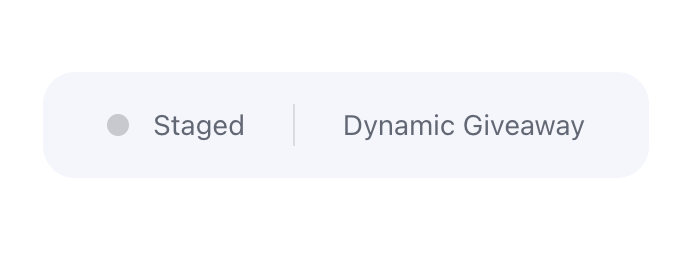
-
If you enabled a duration for the giveaway, you'll see the status change to Staged after the duration is complete. This means nobody else can join the giveaway and you're ready to pick winners.
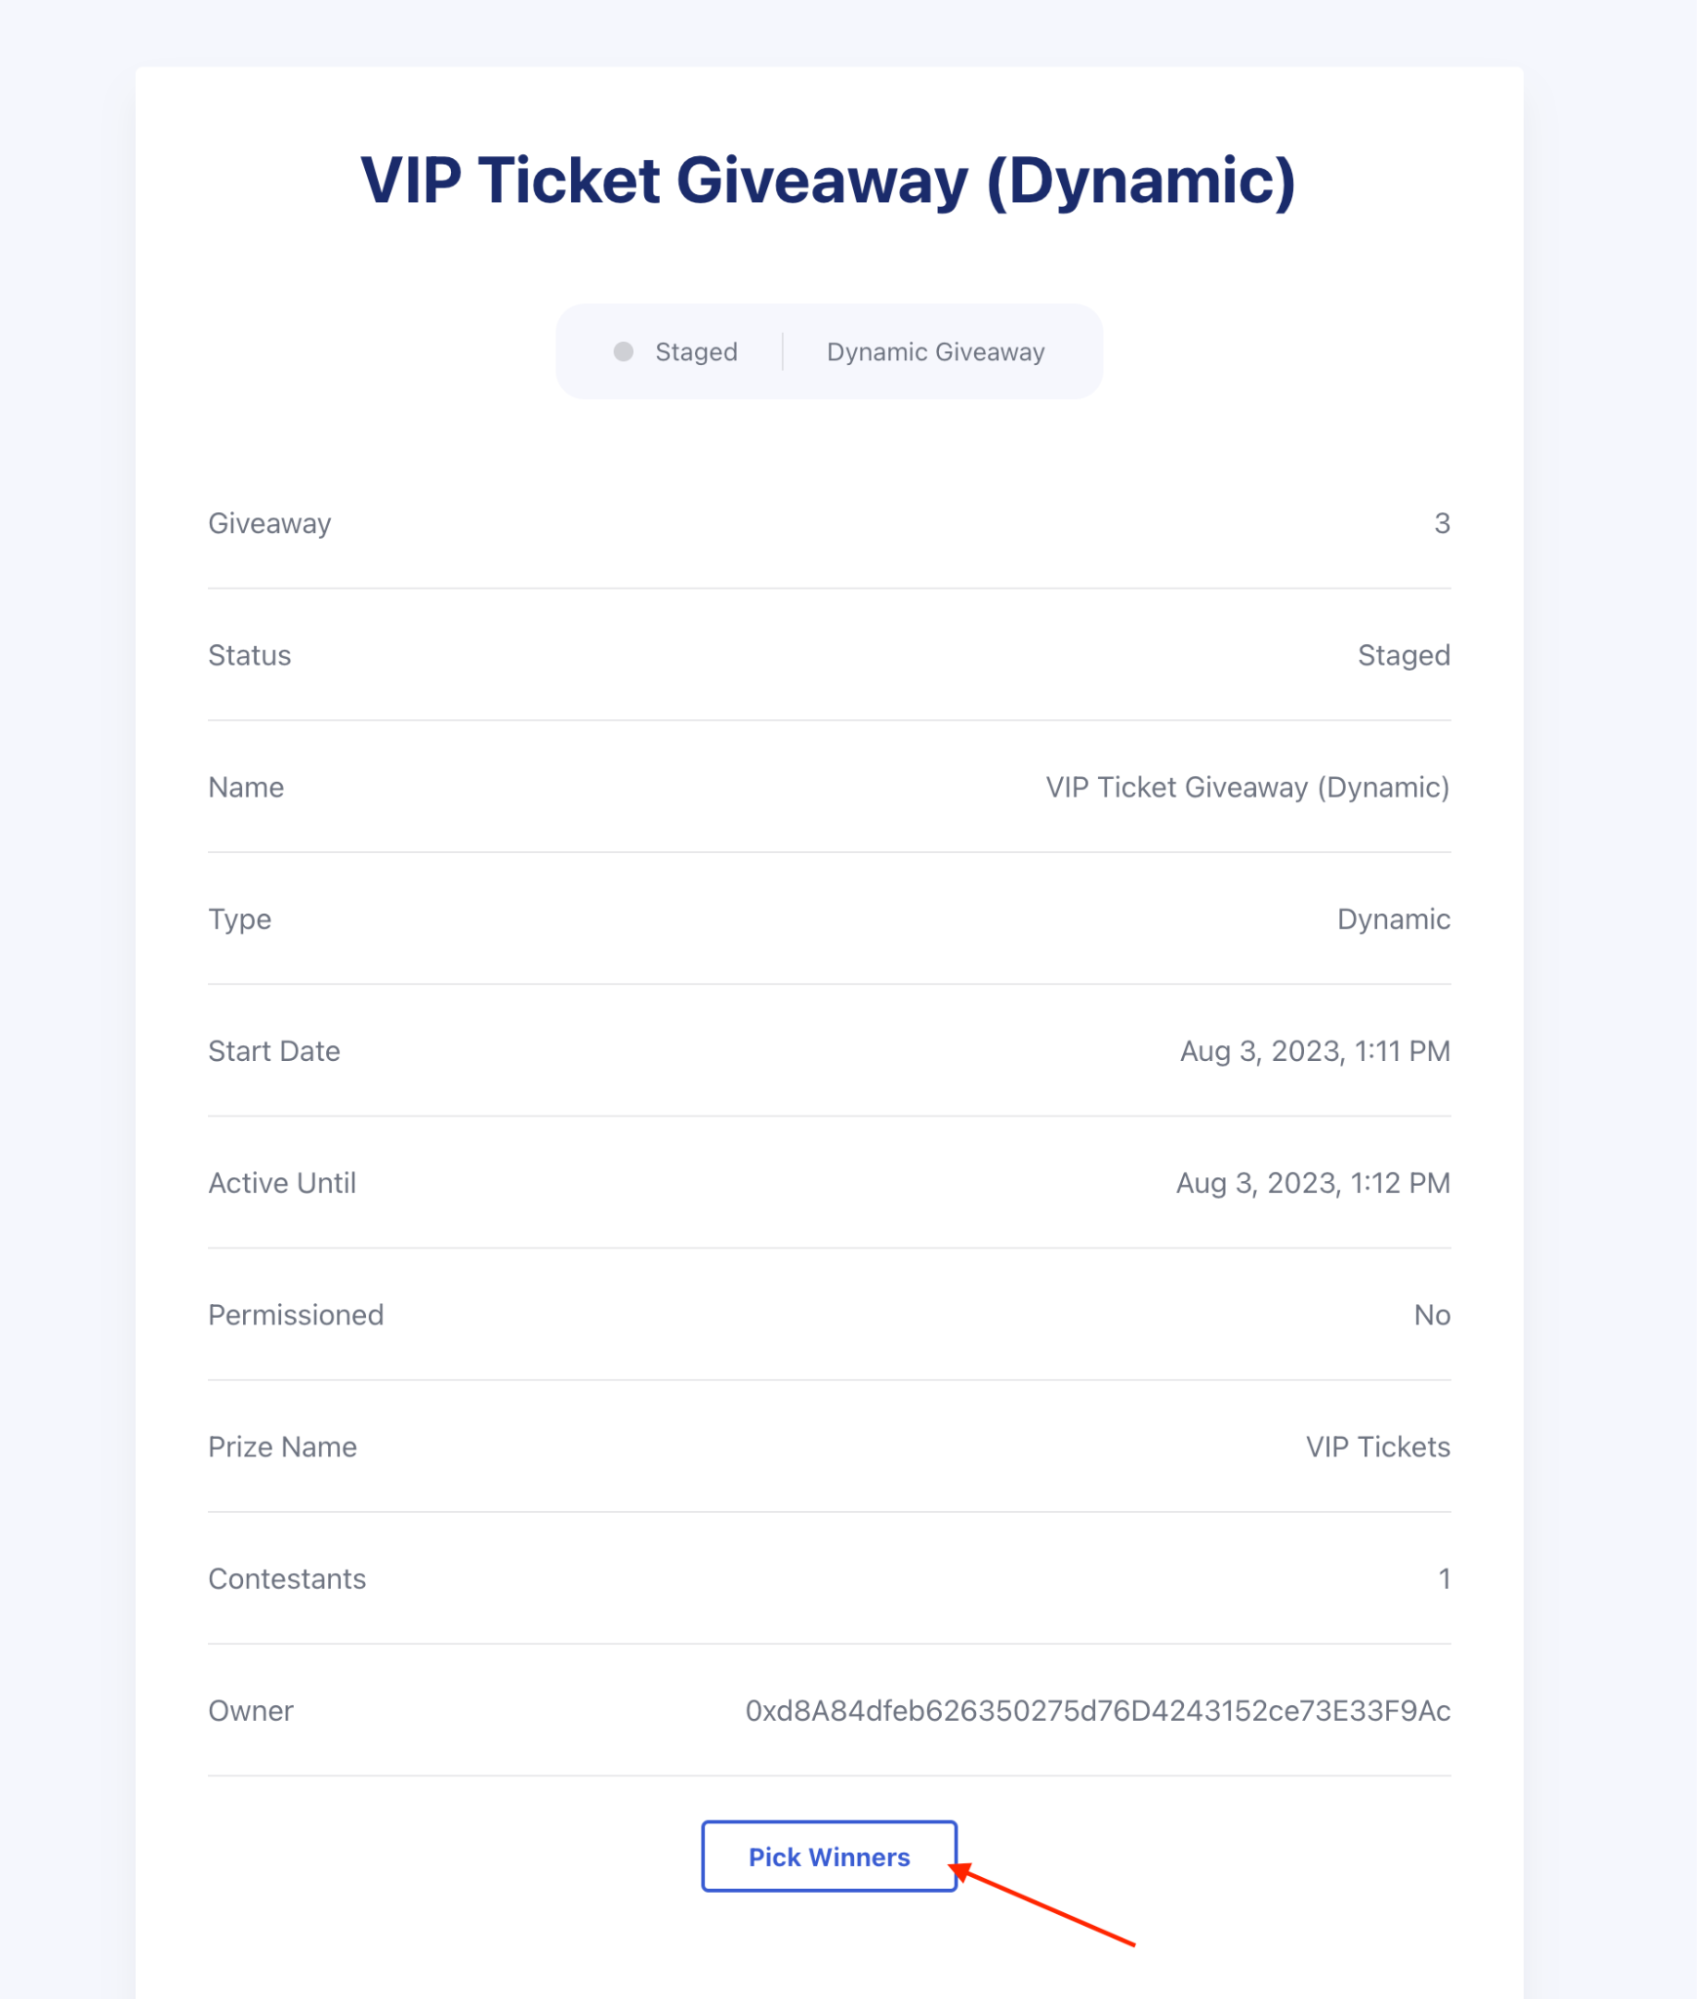
-
The details for your giveaway are displayed. Click Pick Winners and confirm the wallet transaction.
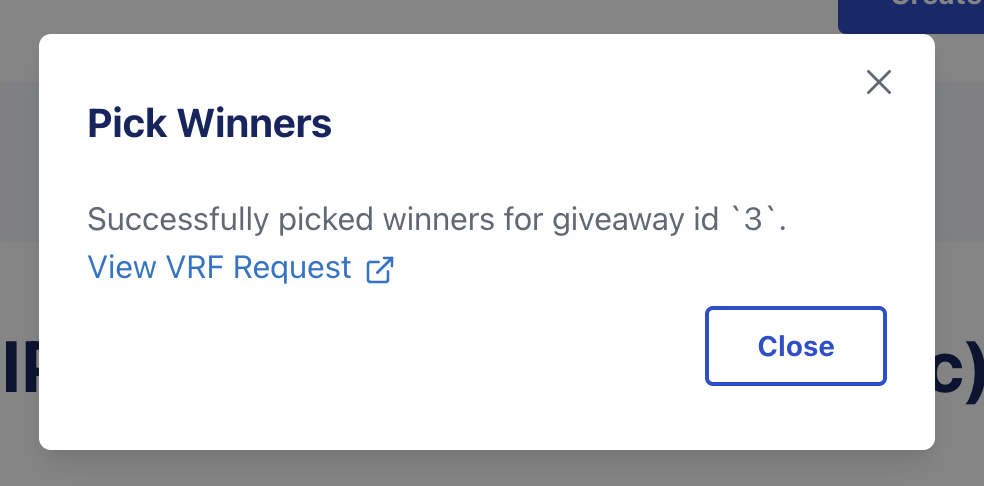
-
A "Pending Transaction" popup displays while the transaction is processing. Once the transaction is complete, you should see a "Successfully picked winners" message. Click Close.
- Optional: You can reference the "View VRF Request" link to help prove the giveaway was fair.
-
After the transaction is confirmed, the Giveaway status changes to Finish. Click View Winners to see the wallet addresses of those who won.

You can export a CSV list of all the winners and share the list with participants if you wish. You can also choose to provide the VRF transaction as evidence that Chainlink VRF was used for fairness.
Reference
Testing
To test contracts, navigate to the contracts directory and run the following command:
# <root>/contracts
make test-contracts-all
To test the UI, navigate to the /client/packages/ui directory and run the following commands:
# <root>/client/packages/ui
$ yarn test
$ yarn tsc
$ yarn lint
$ yarn prettier
Required balance amounts
As a creator of a giveaway, the minimum token requirements are needed to ensure that your giveaway is created and finished without issues. All unused LINK token amounts are able to be withdrawn after completion of giveaway.
- 5.1 LINK
- 0.1 (VRF request)
- 5 (Automation subscription)
Giveaway Status
After picking winners is initiated in the UI, the status of the giveaway is moved to pending. Each subsequent block is then checked to see if the VRF request has been finished and winners picked. Once found, the status is automatically moved to finished. The winners are then able to be viewed and leftover LINK is able to be withdrawn.
Developer Integration for Entering Dynamic Giveaway
The Giveaway contract is able to be integrated with any application that is able to send a transaction to the contract. The user will need to call the enterGiveaway function with the following parameters:
giveawayId- The ID of the giveaway that the user is enteringentries- The amount of entries the user is purchasingproofThe merkle proof of the user's entry if the giveaway is permissioned
This is how the UI in this repo calls the enterGiveaway function using wagmi:
export const enterGiveaway = async (params: contracts.EnterGiveawayParams) => {
  try {
    const { id, proof, fee } = params
    const config = await prepareWriteContract({
      address: giveawayManagerContractAddress,
      abi: giveawayManagerABI,
      functionName: 'enterGiveaway',
      overrides: {
        value: ethers.utils.parseEther(fee)
      },
      args: [id, params.entries ? params.entries : 1, proof ? proof : []]
    })
    const data = await writeContract(config)
    return data
  } catch (error: any) {
    throw new Error(`Error entering giveaway: ${error.message}`)
  }
}

export interface EnterGiveawayParams {
  id: number
  entries?: number
  proof?: string[]
  fee: string
}