Overview
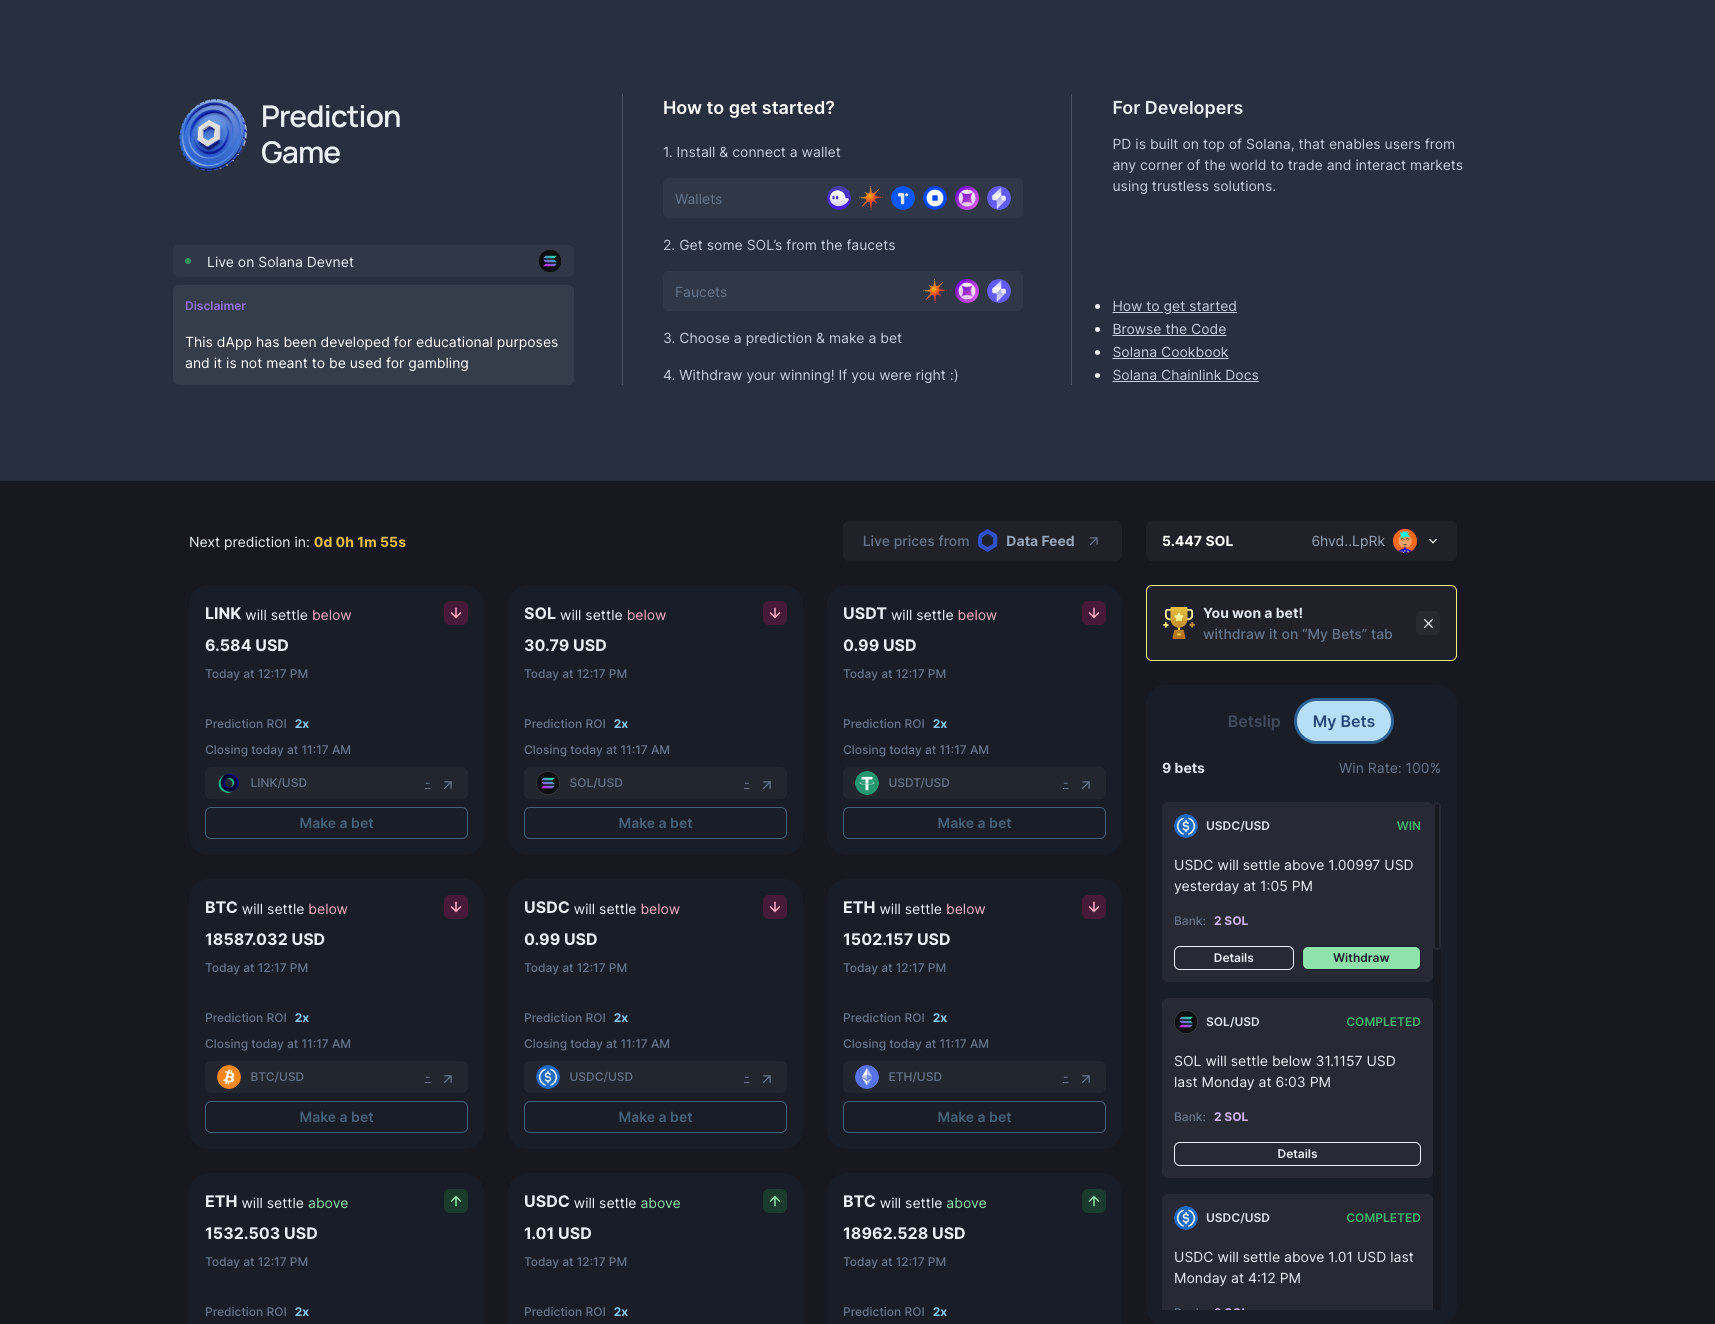
You can use onchain Chainlink Data Feeds to demonstrate how to build a simple prediction game using Solana.
Objective
This tutorial shows you how to install and configure the Solana Prediction Game locally so you can learn from this example and build your own applications on Solana that use Chainlink Data Feeds. You will set up your Solana environment, configure Vercel, and configure a MongoDB database.
Before you begin
-
Install [Node.js 14 or higher][node.js-url]. Run
node --versionto verify which version you have installed:node --version -
Set up
yarnpackage manager.npm i -g yarn -
Set up
ghon your machinenpm install -g gh -
Fork and clone the repo
gh repo fork https://github.com/smartcontractkit/solana-prediction-game.git --clone -
Set up Solana CLI
-
Run
solana --versionto make sure the Solana CLI is installed correctly.solana --version -
Set up Vercel
-
To install the latest version of Vercel CLI, run this command:
npm i -g vercel -
To quickly start a new project, run the following commands:
cd solana-prediction-game # Change directory to the project vercel # Deploy to the cloud -
Connect your Git repository to Vercel and deploy with git push.
-
-
Set up a Solana wallet. For this example, install the Phantom wallet:
- Visit https://phantom.app/download and select your browser type. Follow the steps in your respective extension store to add Phantom to your browser. After installing, you should see Phantom start-up in a new tab.
- If you are a brand new Solana user, select "Create New Wallet" and create a password. If you are an existing Solana user, you can follow the steps here to migrate your existing wallets to Phantom.
- Store your "Secret Recovery Phrase" in a safe and secure location, it is the only way to recover your wallet. Whoever has access to this phrase has access to your funds.
-
Set up Phantom mobile app.
- Visit https://phantom.app/download and select the app marketplace according to your device type (iOS/Android). You will be redirected to the Phantom application on your device app store, follow the steps to download and install the application on your device. After installing, open the app and you should see the Phantom onboarding screen to set up a new wallet.
- If you are a brand new user, select "Create a new wallet" and enable the device authentication (which may vary according to the device type) to protect your wallet from unauthorized access. If you are an existing Solana user, you can select "I already have a wallet" and enter your seed phrase to restore your wallets.
- You can add additional security, e.g: enabling bio-metric security or face recognition, in Settings (Upper left corner), Security & Privacy.
-
Switch to Solana Devnet
-
Open your Phantom Wallet, click on the gear icon in the bottom right-hand corner, scroll to Change Network and click on Devnet.
-
Airdrop yourself Devnet Solana Tokens.
-
Open the faucet: https://solfaucet.com/
-
Copy your Phantom Wallet address
-
Paste your wallet address into the text field and then click 'DEVNET' to send the Solana token
Steps to implement
1 Configure the application
- Change to the project directory
cd solana-prediction-game - Run
cp .env.example .env - Install the NPM packages
yarn - Download a wallet extension on your browser, preferably Phantom. Follow the instructions to set up your wallet.
- You need an Escrow account to hold and pay out Solana to your users. There are two ways to acquire this:
- Copy your private key from your Wallet. In this example, we will be using Phantom.
- Open the Phantom browser extension menu
- Create a new account
- Select the menu and pick
Security and Privacy - Then
Export Private Key - Enter your password.
- Copy the contents to
WALLET_PRIVATE_KEY=in.env
- Create a temporary Solana wallet via
solana-keygen. Alternatively, if you have an existing wallet that you want to use, locate the path to your [keypair][keypair-url] file and use it as the keypair for the rest of this guide.
Copy the contents of the array insolana-keygen new --outfile ./id.json./id.jsontoWALLET_PRIVATE_KEY=in.env
- Copy your private key from your Wallet. In this example, we will be using Phantom.
2 Set up a MongoDB database
-
Set up a MongoDB account via the following tutorial: Create MongoDB Account.
-
Set up MongoDB cluster. Create Cluster
-
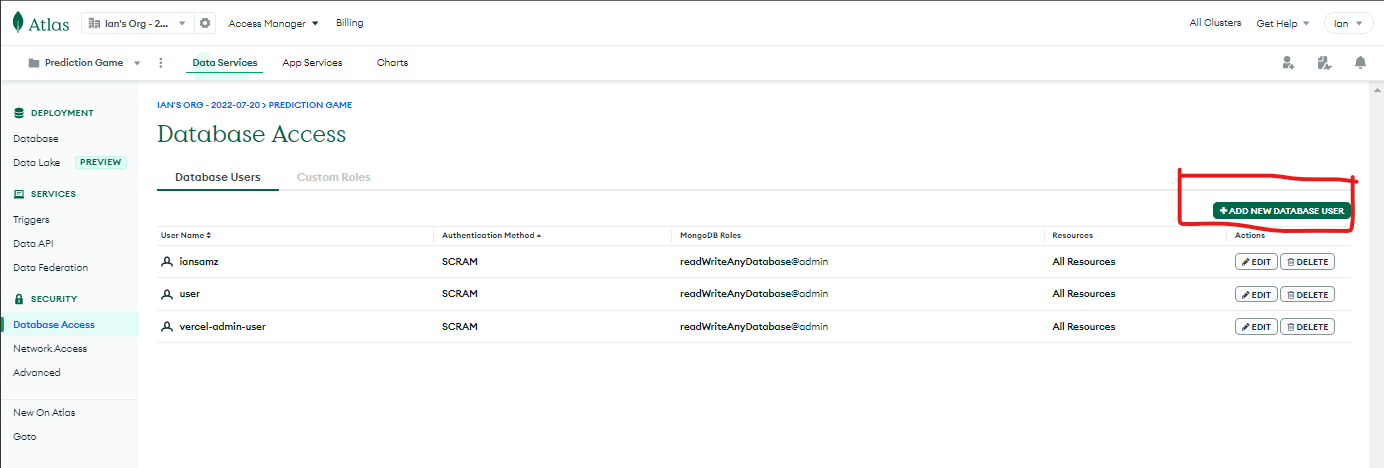
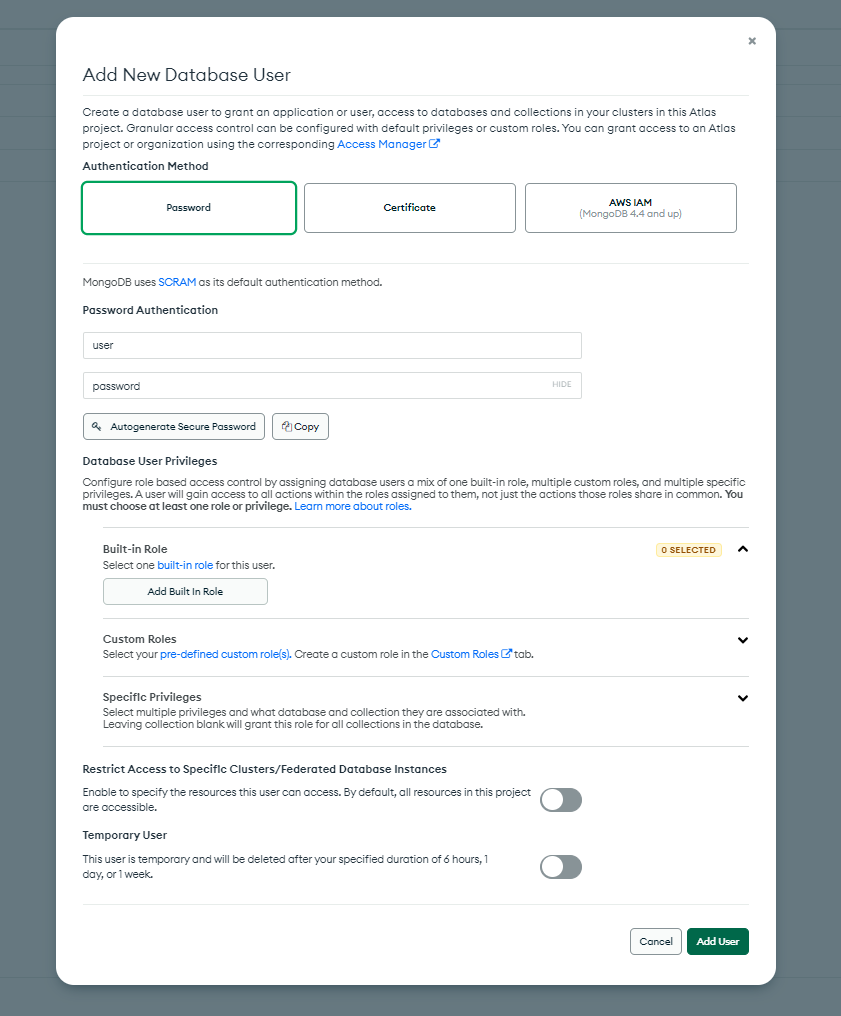
Set up MongoDB User. Create User
-
Get the MongoDB Connection URI.
- Navigate to the Database Deployments page for your project.
- Click the Connect button.

- Select
Connect your application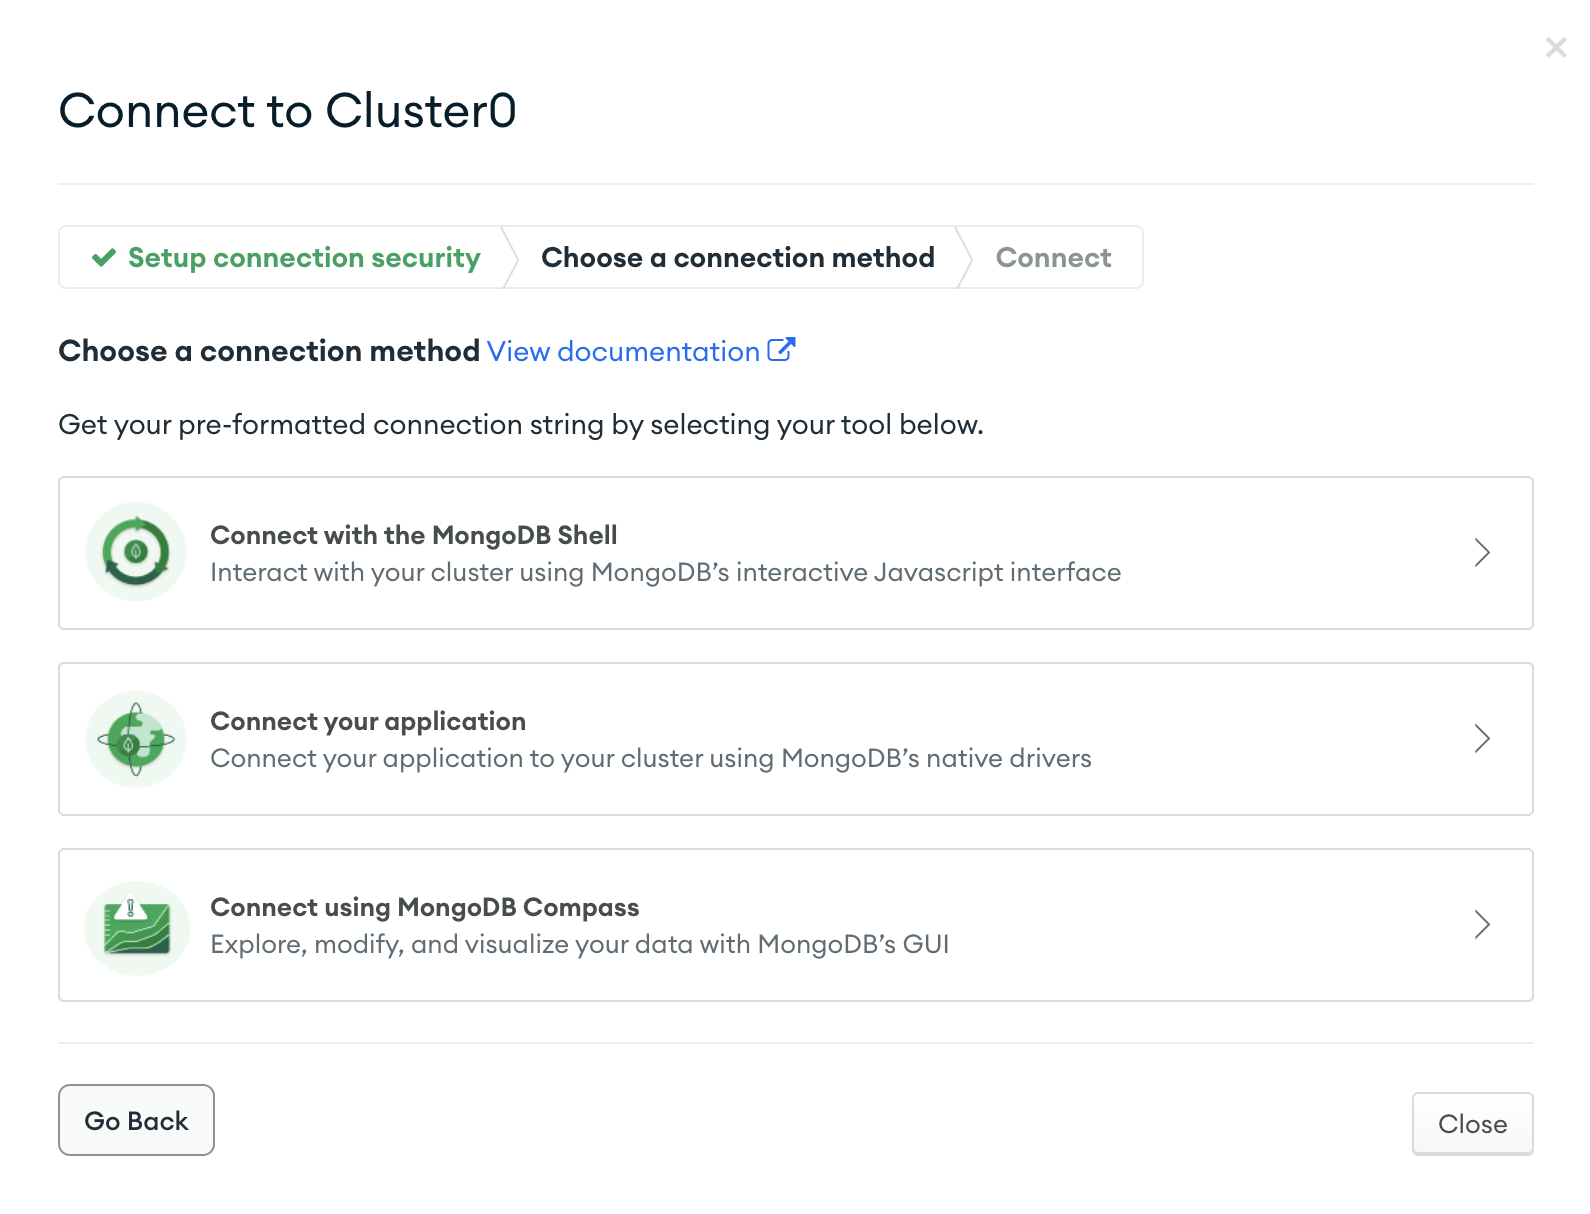
- Copy the connection URI string to
MONGODB_URI=in your.env.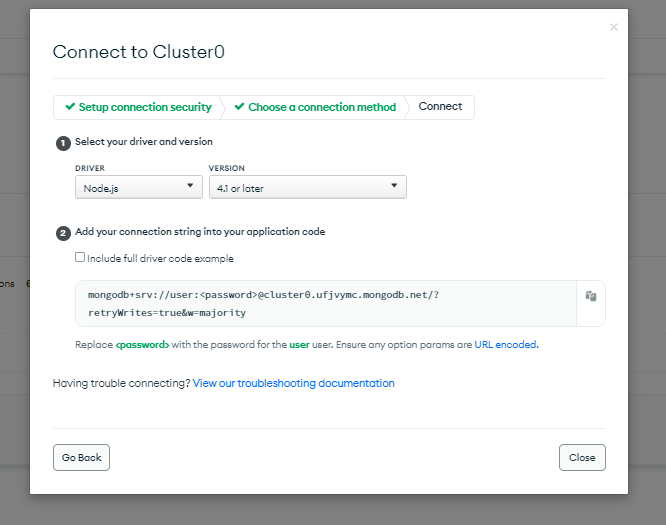
- Replace the
<user>and<password>to yourMONGODB_URIwith the username & password you created.
-
Configure your Network Connection for your local development and deployment
-
For Local development.
- On the left sidebar of your screen select
Network Access - Click on
Add IP Address. - Click
Add My Current IP Address. - Click
Confirmand your IP address is added to the list of addresses.
- On the left sidebar of your screen select
-
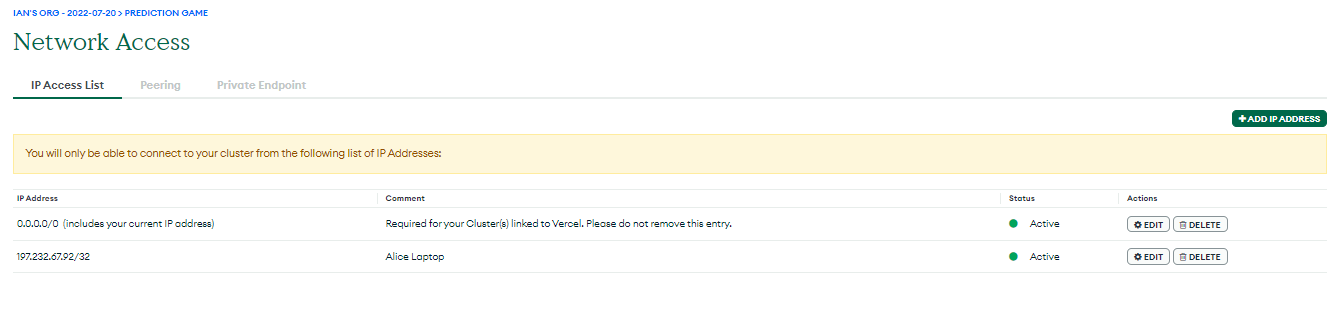
For
Verceldeployment.- On the left sidebar of your screen select
Network Access. - Click on
Add IP Address. - In the box labeled
Access List Entryadd0.0.0.0/0. - In the box labeled
Required for your Cluster(s) linked to VerceladdRequired for your Cluster(s) linked to Vercel. - Click
Confirmand your IP address is added to the list of addresses.
- On the left sidebar of your screen select
-
3 Run the example
-
Generate a random API key here and copy it to
API_SECRET_KEY=. -
Run the following command to start the application:
yarn development
You can access the app at the URL provided by Vercel.